Managing individual and clusters of virtual machines deployed to the cloud infrastructure as a service (IaaS) hosted at excellent service providers' datacenters, I seldom considered the platform as a service (PaaS) cloud delivery model. That is probably due to the fact that a proprietary PaaS had been implemented by a known vendor as a large scale extension of its monopoly in desktop operating systems. Accordingly, it was refreshing when the leading open source vendor implemented OpenShift, a PaaS offering based on Red Hat Enterprise Linux (RHEL) cloud, and made available in free small computing resource allocations for developers to test.
I had, a couple of months ago, scanned an article where an individual asserted that he had implemented his popular blog software onto OpenShift and I wondered about the feasibility of hosting b2evolution blog/CMS open source software onto OpenShift as well. Funny, when your perspective has been shaped by the IaaS cloud delivery model, it gradually dawns on you the need to articulate the fact that what you host on PaaS are applications --not servers. Thus, I never came about actually trying OpenShift until I became aware that Red Hat would be offering a ?pricing model comprised of different tiers.? It was then I realized OpenShift was mature and its cloud platform stack adequate to match the professional stability and security of b2evolution.
Installing rhc, the powerful command line client for OpenShift PaaS, under Debian
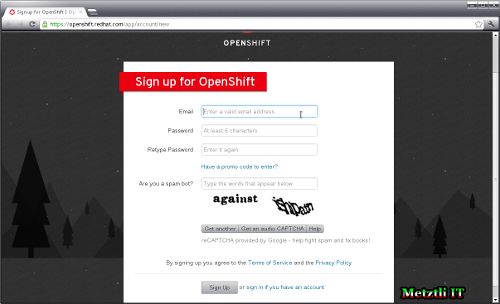
If you have not, please sign up for a free OpenShift Express account. Unlike other places, you will not be required a credit card thus please don't abuse the resource.
After you sign up and log into your OpenShift account you need to input your very own namespace, prepending it to Red Hat's rhcloud.com global cloud domain. Subsequently an application name must be created which ideally will reflect the nature of your application on OpenShift PaaS. Thus an initial applicationname-namespace structure will be of the form:
[protocol]://applicationname-namespace.rhcloud.com
Although OpenShift offers a web console with fields that you fill-in to input your applicationname-namespace, we will be using the command line to install rhc client under Debian Unstable (sid). Using rhc will enable us certain automation on specifying our namespace and uploading our generated public ssh key to the OpenShift server.
Accordingly, we acquire root privilege under Debian and we follow the instructions presented at Getting Started with OpenShift.
$ apt-get update
$ apt-get install ruby git rubygems
Once the above prerequisites have been fulfilled, we install the actual rhc OpenShift client:
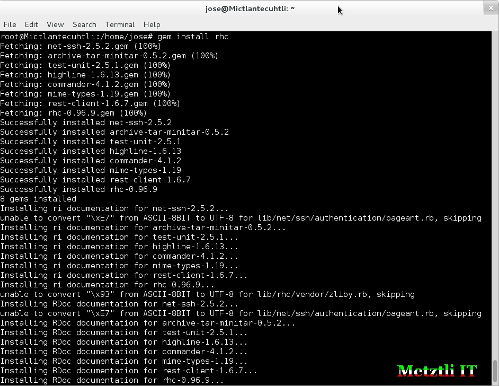
$ gem install rhc
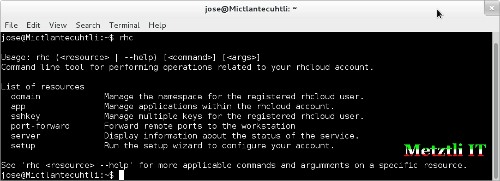
And that's it ![]() ! Open a new shell prompt window or release your root privileges because those will not be necessary to interact with the OpenShift cloud. Subsequently we test our OpenShift client by typing it without arguments:
! Open a new shell prompt window or release your root privileges because those will not be necessary to interact with the OpenShift cloud. Subsequently we test our OpenShift client by typing it without arguments:
$ rhc
Usage: rhc (<resource> | --help) [<command>] [<args>]
Command line tool for performing operations related to your rhcloud account.List of resources
domain Manage the namespace for the registered rhcloud user.
app Manage applications within the rhcloud account.
sshkey Manage multiple keys for the registered rhcloud user.
port-forward Forward remote ports to the workstation
server Display information about the status of the service.
setup Run the setup wizard to configure your account.See 'rhc <resource> --help' for more applicable commands and argumments on a specific resource.
If from the ensuing list of resources we select app and request help by including relevant argument:
$ rhc app --help
A side effect of specifying resource app (Manage applications within the rhcloud account.), is that it is implemented as if we had typed the command:
$ rhc setup
which will configure the OpenShift client tools in our Debian machine. Accordingly rhc will display output somewhat similar to the following line:
Starting Interactive Setup for OpenShift's command line interface
...To connect to OpenShift.redhat.com enter your OpenShift login (email or Red Hat login id):
Password:
...Created local config file: /home/userName/.OpenShift/express.conf
The express.conf file contains user configuration, and can be transferred to different computers.No SSH keys were found. We will generate a pair of keys for you.
...Your public ssh key must be uploaded to the OpenShift server. Would you like us to upload it for you? (yes/no)
...Sending new key default .. Success
We will now check to see if you have the necessary client tools installed.
Checking for git ... found
Checking for your namespace ... not found
Your namespace is unique to your account and is the suffix of the public URLs we assign to your applications. You may configure your namespace here or leave it blank and use 'rhc domain create' to create a namespace later. You will not be able to create applications without first creating a namespace.Please enter a namespace or leave this blank if you wish to skip this step:
nepohualtzintzinYour domain name 'nepohualtzintzin' has been successfully created
Checking for applications ... none found
Below is a list of the types of application you can create: Obtaining list of cartridges (please excuse the delay)...
* nodejs-0.6 - rhc app create -t nodejs-0.6 -a <app name>
* ruby-1.9 - rhc app create -t ruby-1.9 -a <app name>
* jbossas-7 - rhc app create -t jbossas-7 -a <app name>
* python-2.6 - rhc app create -t python-2.6 -a <app name>
* jenkins-1.4 - rhc app create -t jenkins-1.4 -a <app name>
* ruby-1.8 - rhc app create -t ruby-1.8 -a <app name>
* jbosseap-6.0 - rhc app create -t jbosseap-6.0 -a <app name>
* diy-0.1 - rhc app create -t diy-0.1 -a <app name>
* php-5.3 - rhc app create -t php-5.3 -a <app name>
* perl-5.10 - rhc app create -t perl-5.10 -a <app name>The OpenShift client tools have been configured on your computer. You can run this setup wizard at any time by using the command 'rhc setup' We will now execute your original command (rhc app --help)
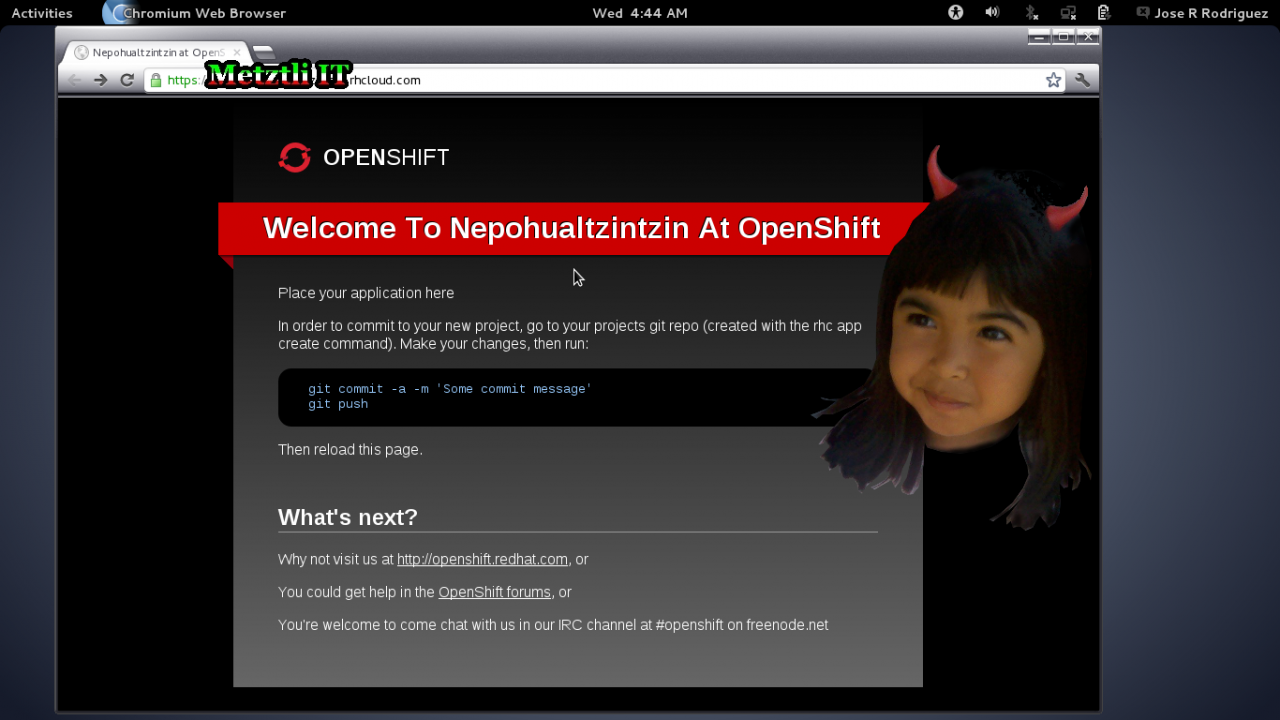
![]() Please note above in sample output that I have defined my unique namespace: nepohualtzintzin. It was the computational instrument par excellence of the Maya and the Mexicah but was destroyed by the Spanish (circa 1521) because, under the ignorance of their religious fanaticism, the Iberians regarded the instrument of calculus as in the domain of "the devil"
Please note above in sample output that I have defined my unique namespace: nepohualtzintzin. It was the computational instrument par excellence of the Maya and the Mexicah but was destroyed by the Spanish (circa 1521) because, under the ignorance of their religious fanaticism, the Iberians regarded the instrument of calculus as in the domain of "the devil" ![]() ...(sigh)
...(sigh) ![]()
By depriving future generations in Mexico of Maya and Mexicah's advanced mathematics, and specifically of their base 20 calculation mastery, the Spanish colony effectively submerged the "New Spain" (subsequently masked as "Mexico") into an obscure phase from which it has yet to emerge.
Given the level of caustic marginalization of the real Maya and Mexicah by the Iberian perspective prevalent in "Mexico", it is not surprising that a Java implementation of the nepohualtzintzin has been developed elsewhere: "nepohualtzintzin A mesoamerican abacus"
Well, pardon my fleeting thoughts, I will leave that story for another time ![]()
Deploying b2evolution blog/CMS application into our domain on OpenShift.
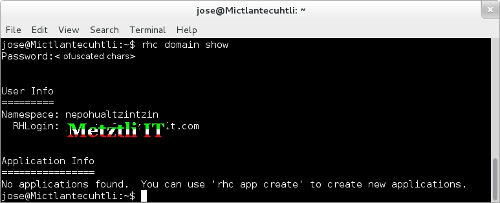
Just to verify our namespace prior to creating our first b2evolution app, we type:
$ rhc domain show
Ok, reading the output we see that nepohualtzintzin is in effect our namespace. Cool ![]() Now we are ready to figure out how to specify the creation of our b2evolution application.
Now we are ready to figure out how to specify the creation of our b2evolution application.
Thus, if we were to type in (again):
$ rhc app --help
Obtaining list of cartridges (please excuse the delay)...
Usage: rhc app (<command> | cartridge <cartridge-action> | --help) [<args>]
and scrolling down we focus on
List of commands
create Create a new application on OpenShift
...
List of arguments
...
-a|--app application Application name (alphanumeric - max 32 chars) (required)
-t|--type type Type of app to create (nodejs-0.6, ruby-1.9, jbossas-7, python-2.6, jenkins-1.4, ruby-1.8, jbosseap-6.0, diy-0.1, php-5.3, perl-5.10) (required for creating an application)
...
And zeroing on additional component(s) information for our application by forming a slightly more complex request for info:
$ rhc app cartridge list
List of supported embedded cartridges:
Obtaining list of cartridges (please excuse the delay)...
mongodb-2.0, cron-1.4, mysql-5.1, postgresql-8.4, haproxy-1.4, 10gen-mms-agent-0.1, phpmyadmin-3.4, metrics-0.1, rockmongo-1.1, jenkins-client-1.4
![]() Please note that I have darkened the strings that are relevant to the creation of our b2evolution application under our nepohualtzintzin namespace. Accordingly we create a PHP application named... b2evolution, of course!
Please note that I have darkened the strings that are relevant to the creation of our b2evolution application under our nepohualtzintzin namespace. Accordingly we create a PHP application named... b2evolution, of course!
$ rhc app create -a b2evolution -t php-5.3
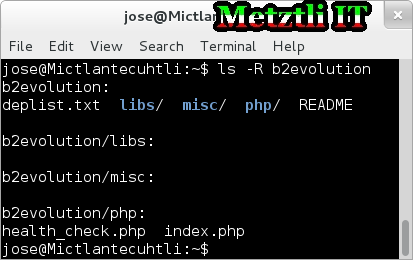
![]() Also note that, at our current file system location, we will have a newly created directory named to match our newly created application -- that is, b2evolution. Our b2evolution directory will have the following contents:
Also note that, at our current file system location, we will have a newly created directory named to match our newly created application -- that is, b2evolution. Our b2evolution directory will have the following contents:
$ ls -R b2evolution
Our rhc-created b2evolution directory will have the following contents:
Code
b2evolution: | |
deplist.txt libs/ misc/ php/ README | |
| |
b2evolution/libs: | |
| |
b2evolution/misc: | |
| |
b2evolution/php: | |
health_check.php index.php |
Please remove the index.php file from the b2evolution/php/ directory
$ rm -iv b2evolution/php/index.php
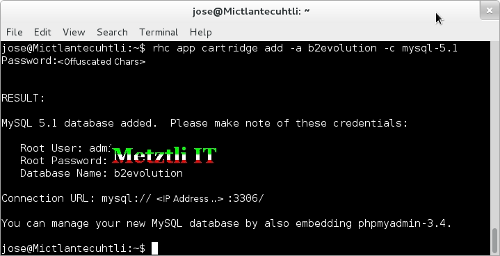
After our b2evolution application is successfully created, we need to add a MySQL cartridge to our application as follows:
$ rhc app cartridge add -a b2evolution -c mysql-5.1
![]() Please make sure to note your Root user name, password, and the database name: b2evolution (also matches our application and local directory name
Please make sure to note your Root user name, password, and the database name: b2evolution (also matches our application and local directory name ![]() )
)
Now we change to our b2evolution local directory:
$ cd b2evolution
At the time of this post, the current version of b2evolution is 4.1.5 and the compressed file is named b2evolution-4.1.5b-stable-2012-07-26.zip ![]() Please, don't be fooled by the "4.1.5b" for it does not mean that it is beta release; b-designation simply fixes a minor issue for those administrators who are upgrading.
Please, don't be fooled by the "4.1.5b" for it does not mean that it is beta release; b-designation simply fixes a minor issue for those administrators who are upgrading.
Assuming that we have downloaded the b2evolution blog/CMS software into our local Downloads directory, we proceed to extract its contents to Debian /tmp directory as follows:
$ unzip -d /tmp ~/Downloads/b2evo*zip
We will find that by default the extraction creates a /tmp/b2evolution directory. Now proceed to "pour" all the contents of /tmp/b2evolution/blogs/* into our current php/. directory (remember we are at the ~/b2evolution/):
$ mv -v /tmp/b2evolution/blogs/* php/.
After our php/ directory is populated with the /tmp/be2evolution/blogs/* content, it is time to make our first commit:
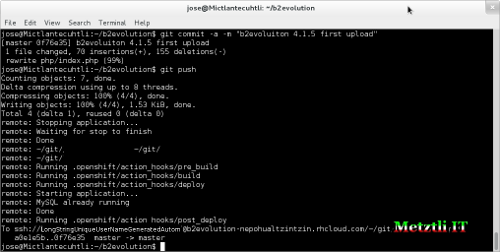
$ git commit -a -m "b2evoluiton 4.1.5 first upload"
[master 0f76e35] b2evoluiton 4.1.5 first upload
1 file changed, 70 insertions(+), 155 deletions(-)
rewrite php/index.php (99%)
![]() Notice that I made a mistake in my commit message: I wrote
Notice that I made a mistake in my commit message: I wrote b2evoluiton instead of b2evolution. I am doing this LIVE.
Subsequently, we follow with:
$ git push
and read the line of the immediate output that reads similar to:
Counting objects: 7, done.
![]() as the snapshot below:
as the snapshot below:
then something went wrong ![]()
Now, assuming that your current directory location continues to be at b2evolution, type:
$ git add .
(note the dot "." at the end) and let the command finish. Now we will try once again:
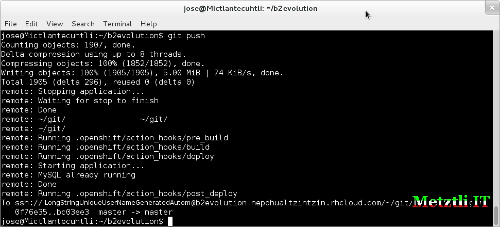
$ git push
this time the the line of the immediate output should count far more than "7 objects", similar to next:
Counting objects: 1907, done.
If you have reached the above phase, paquilizcayolli [congratulations]! You just uploaded your b2evolution blog/CMS software to OpenShift cloud platform.
Accessing b2evolution blog/CMS web-based set up.
Well, I could access my b2evolution installation script by directing my browser to the web address:
[protocol]://b2evolution-nepohualtzintzin.rhcloud.com
Nevertheless, it is a fact that the application created will be accessed from a custom domain name and not as a subdomain of Red Hat's rhcloud.com. This is true especially if you will be paying Red Hat to host your application(s) on OpenShift cloud platform. Well, even for the free OpenShift Express resource(s), we can access our application from our custom domain by adding an alias as below:
$ rhc app add-alias -a b2evolution --alias b2evolution.nepohualtzintzin.com
Password: <myOpenShiftPassword>
RESULT:
Success
Until terminated by the developer or administrator, we have enabled b2evolution application to be accessed by the alias; but we must also, if not already, add a CNAME at my DNS management provider to reflect the alias to b2evolution application hosted at OpenShift rhcloud.com domain.
As a specific instance for this post, my b2evolution.nepohualtzintzin.com is an alias for the canonical name: b2evolution-nepohualtzintzin.rhcloud.com.
Please note that it takes several hours after correctly modifying DNS settings to propagate accordingly.
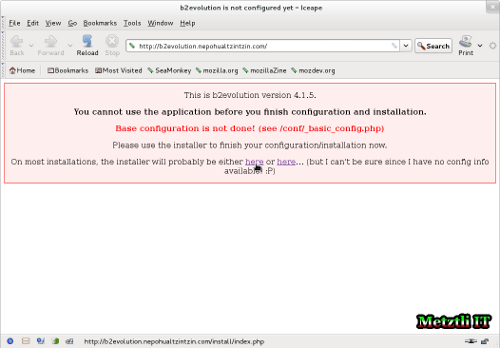
Ok, after having done the above I proceed to point my browser to:
$ iceape [http]://b2evolution.nepohualtzintzin.com
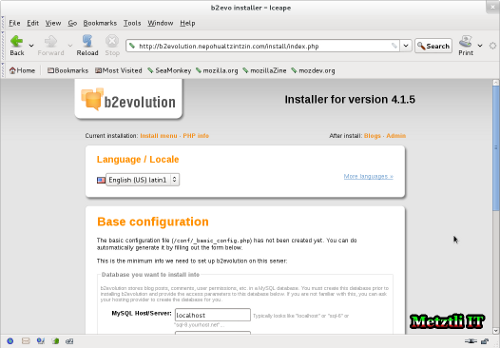
I select the first link suggested by the installation web interface and press it to proceed to the Base configuration of b2evolution:
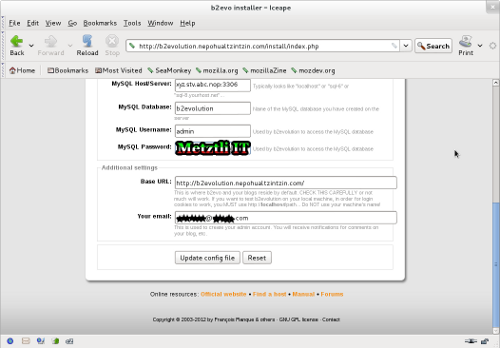
I scroll down and get ready to input the values generated automagically to the screen when we added the MySQL cartridge before, remember?
![]() Please note that you must overwrite b2evolution predefined value localhost and input the IP addres and the port number where MySQL listens for connections. Thus it has the form of xyz.stv.abc.nop:3306 and after all fields are completed select Update config file to proceed.
Please note that you must overwrite b2evolution predefined value localhost and input the IP addres and the port number where MySQL listens for connections. Thus it has the form of xyz.stv.abc.nop:3306 and after all fields are completed select Update config file to proceed.
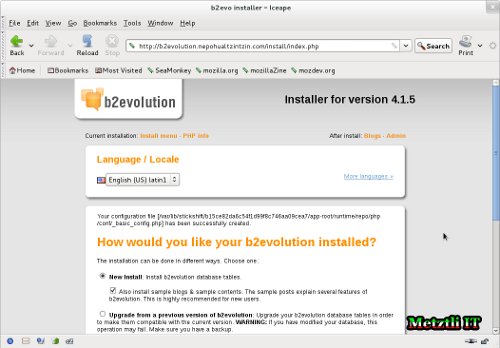
Select you language if other than the default. Select radio button New Install (not if later you upgrade, evidently). And leave the check mark to install sample blogs and sample content if you are not familiar with b2evolution.
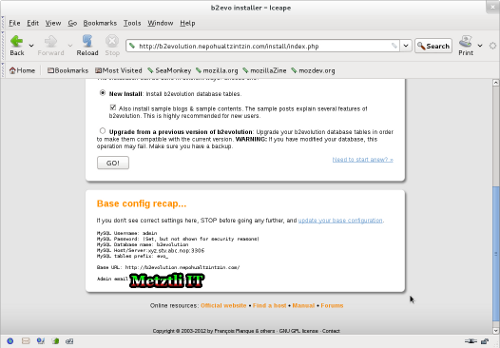
Scroll down and verify the information under the Base config recap... section. If the information does not reflect your intended values, then STOP and select the link to your right that reads: update your base configuration to go back and make corrections; otherwise select the GO! button above the section to proceed.
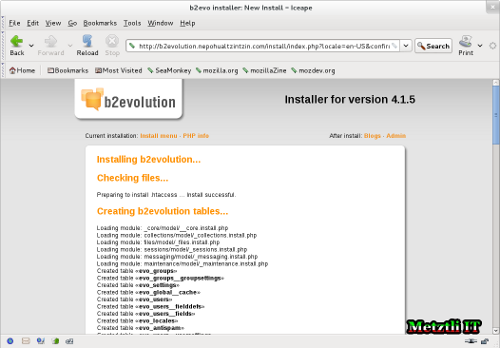
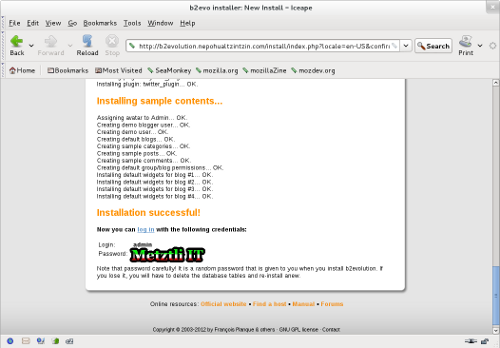
And the web installation should proceed smoothly as shown in the snapshot below:
And scrolling down, after the b2evolution installation routine finishes, we find a temporary Login and password; we will use those to log in to b2evolution for the first time.
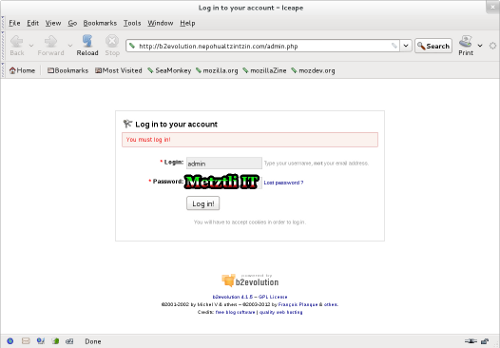
Below the Installation successful! section select log in link to open a new page with empty fields waiting for the temporary credentials that b2evolution provided earlier.
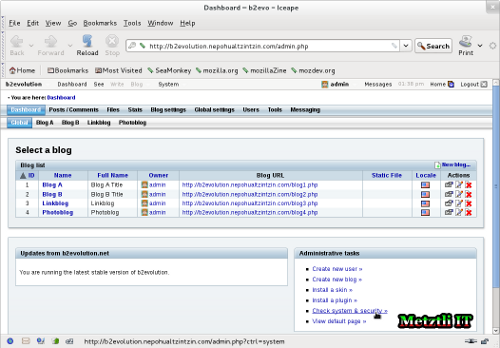
After filling in the fields with the temporary credentials we press the Log in! button and find ourselves in the administration console.
We observe that there are a few sample blogs and sample content (that we selected to install) for those who are new to b2evolution and desire a few hints.
Security in b2evolution blog/CMS is a top concern for developers and users alike. Accordingly we select the lower right entry link, under Administrative tasks section, that reads Check system and security.
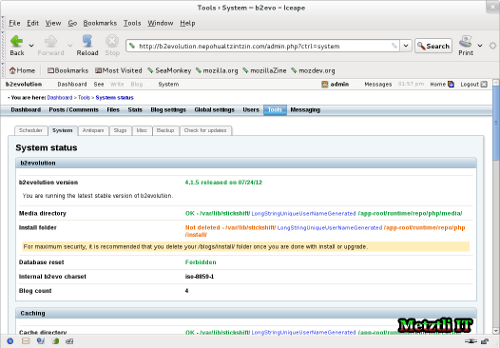
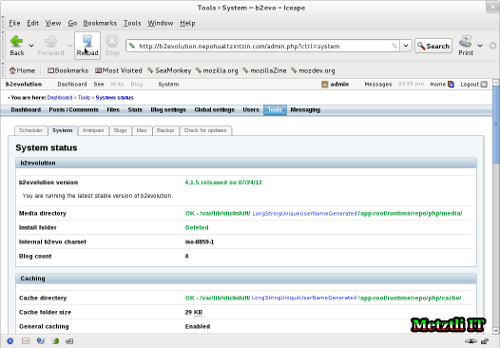
Subsequently we are presented with a System status overview. The orange-colored warning indicates to us that we need to remove the Install folder for b2evolution. Not heeding that warning will expose our application in the OpenShift cloud platform to automated attack scripts in the wild of the Internet.
Accessing our application space at OpenShift PaaS via SSH
For each different application that we create on the OpenShift cloud platform, we are provided with unique long string username. That long string unique username was provided to us when we created our b2evolution application. We may use ssh and the unique username to log into our b2evolution application space and delete the Install folder and thus improve our PHP application security.
$ ssh lngStrUname@b2evolution-nepohualtzintzin.rhcloud.com
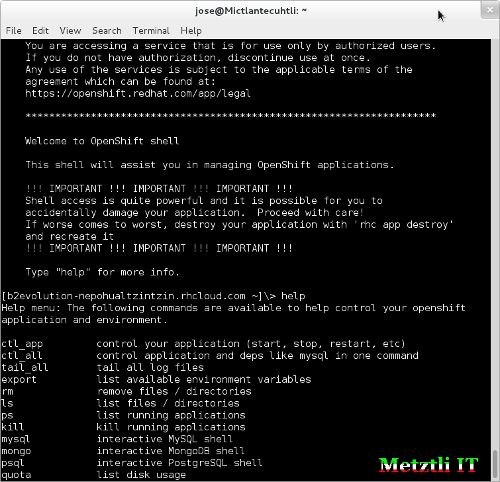
As we are granted ssh access to our b2evolution application space, we are welcomed with a a stern warning for unauthorized users. We can also type help for basic application management commands, as shown above.
And I proceed to remove the Install folder for our b2evolution in the cloud installation:
\> rm -rf app-root/repo/php/install
Now going back to our b2evolution application administration console, and refreshing the iceape browser web interface, we we can see that the warning has disappeared.
I did not touch on additional security actions like modifying our MySQL username/password -- something that can be done from the GUI with PHPMyAdmin (installable as a cartridge). Nor did I touch upon preventing the next git push from wiping configuration and content of our b2evolution blog. This exercise is more like a proof of concept and may subsequently be followed by a git repository for b2evolution, like those of other open source projects who target OpenShift. Who knows? ![]()
Well, hopefully I have shown that the enterprise grade, secure and stable, b2evolution holds its own when it is deployed as an application on OpenShift. Explore and enjoy your b2evolution application... now deployed on Red Hat's cloud!
DISCLAIMER![]() although due diligence has been applied, the above post is intended as a proof of concept for deploying b2evolution to OpenShift Platform as a Service (PaaS).
although due diligence has been applied, the above post is intended as a proof of concept for deploying b2evolution to OpenShift Platform as a Service (PaaS).
Please do not hold me or Metztli Information Technology, or its associates, responsible if the information provided here does not achieve the desired result. The information is provided AS IS and with the hope that it may be useful to the Internet community.
Notwithstanding, There is no implicit or explicit guarantee that the information presented here is accurate. Accordingly, if an user(s) decide to implement the procedure or shell commands described here she, he, or them, do so at her, his, or their own risk. You have been forewarned.
I reserve the right to modify the blog and even to delete it without further notice.

