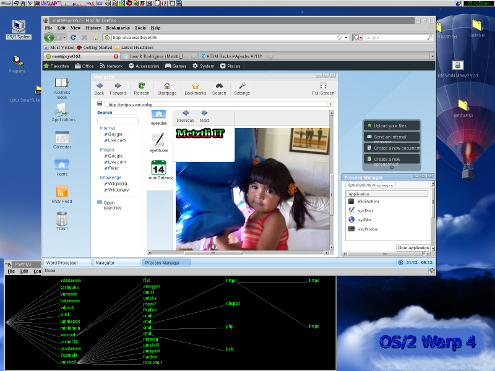
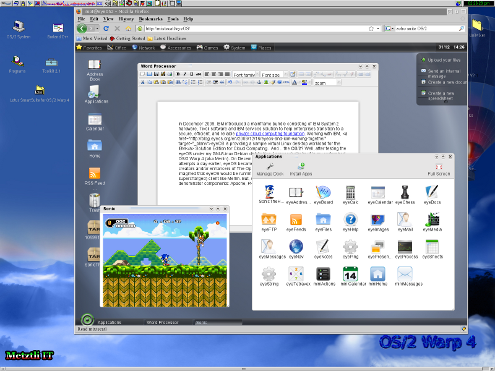
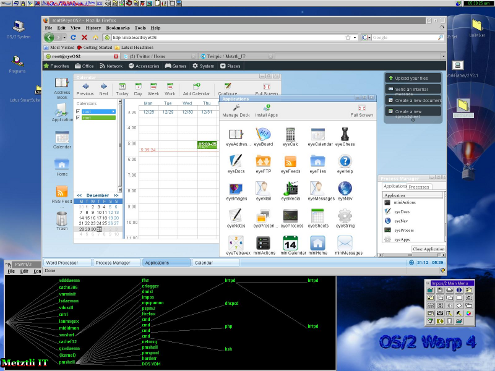
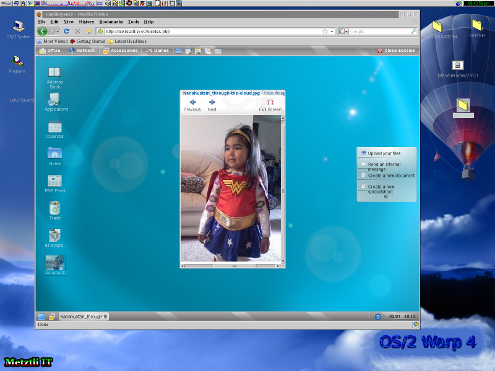
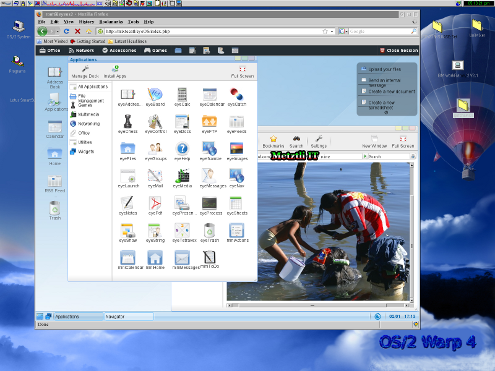
In midst of December 2009, IBM introduced a mainframe bundle consisting of IBM System z hardware, Tivoli software, and IBM services, a solution to help enterprises transition to a secure, efficient, and reliable private cloud computing foundation. Working with IBM, eyeOS is providing a sample virtual Linux desktop workload for the IBM Solution Edition for Cloud Computing. And ...where does the OS/2 fit in the picture?
After verifying the eyeOS functionality under my GNU/Linux Debian distribution, I proceeded to evaluate it in my customized OS/2 Warp 4 (aka Merlin). On December 31, 2009, and after a few unsuccessful attempts a day earlier, eyeOS became operational in this legacy operating system. The creators and/or developers of The Open Source Cloud's Web Desktop likely never envisioned that eyeOS would be running on IBM System z much less on an OS/2 (albeit supercharged) client like Merlin. But, of course, the secret enabler lies in the open source common denominator stack components: Apache, PHP and XML, IMAP, and SQLITE.
EyeOS applications run in a virtual desktop that is accessible through a browser. Unlike the much hyped Google ChromeOS intended accessibility to all applications residing in the Web, eyeOS is targeted to a more specialized set of applications. These applications can be written with the eyeOS Toolkit and may consist of an organization's productivity and custom applications; these latter may be specifically developed to access proprietary data. Hence, although the eyeOS is only an component in the IBM mainframe bundles of which GNU/Linux plays a key strategic role, I see no reason for the OS/2 not to be part of the development, testing, and/or deployment servers in appropriate hardware or virtual infrastructure.
Installing EyeOS into an OS/2 Merlin Host.
Under blogs treating the installation of the b2evolution Open Source Blog/CMS Software into OS/2, I have covered relevant steps to install open source software (OSS) stack components required prior to the installation of eyeOS into an OS/2 host. However, for the sake of completeness, I will go over the operations appropriate for the topic of this blog entry.
As usual, we will acquire the necessary OSS components from the site of the OS/2 developer Paul Smedley; please consider making a donation for his continued dedication to porting Unix/Linux software to the OS/2 -without his OSS ports, applications like eyeOS would not be possible on the closed source OS/2 platform.
Again, we start by creating an workspace directory where we will place our downloaded files and apply operations on those. I will be using an drive of letter name V: for more specific illustration of the procedure.
MKDIR V:\workspace
If not there already, I change directory to drive V:, subsequently to workspace directory,
V:
CD workspace
and I proceed to download the required file resources:
- PHP5 for OS/2 - php-5.2.11-os2-20091124.zip & libc-0.6.3-csd3.zip
- Apache2 - httpd-2.2.14-os2-20091120.zip
- File uncompressor from Hobbes - pkos2250.exe
- And eyeOS (of course) - eyeos 1.9.0.0
Needless to say, the specific versions above are ephemeral in nature. As the OSS developers update their respective software, those will differ from the versions listed above -hopefully you will support the continued development with your donation.
I have downloaded the file pkos2250.exe in case you need a decompressor for files bundled in ZIP format. It is self-executable and -if you need- execute the file in another temporary directory; from the extracted resources, select the file pkzip.exe and copy it over to your [OS/2 root drive letter]:\OS2\ directory; in the ensuing directions, I will be using pkzip.exe and will assume that the OS/2 root drive letter is F:. Once there, the OS/2 user may decompress files from any location in the file system when in an OS/2 command window.
Next the user might decompress the file libc-0.6.3-csd3.zip directly to her OS/2's DLL directory:
pkzip /extr /dir libc-0.6.3-csd3.zip f:\os2\dll\.
That will decompress five(5) DLL files:
libc06.dll
libc061.dll
libc062.dll
libc063.dll
gcc335.dll
COPYING.LIB
Specifically, please make sure to note and record what and where you placed those DLLs for later on you may need to update and/or replace those; generally, anything that you download and place in your OS/2 file system should be noted and recorded for reference.
We are ready now to install the Apache web server and the PHP support required for eyeOS. Although I stated that the OS/2 root drive letter is F:, the Apache and PHP root drive letter will be V:. And proceed to decompress the Apache bundle (assuming I am at the v:\workspace) directory:
pkzip /extr /dir httpd-2.2.14-os2-20091120.zip v:\.
I proceed to decompress the PHP support:
pkzip /extr /dir php-5.2.11-os2-20091124.zip v:\.
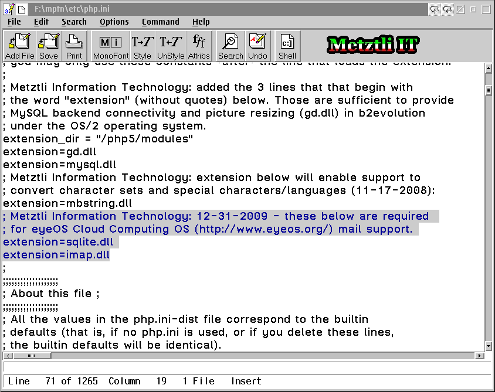
Under the f:\mptn\etc\ directory, (if not already there) user places his php.ini file, which I have made available for reference, and subsequently modifies it by adding the general directives (as below shown) saving the modifications:
extension_dir = "/php5/modules"
extension=gd.dll
extension=mysql.dll
extension=mbstring.dll
extension=sqlite.dll
extension=imap.dll
Additionally, we can see that the OS/2 developer provides a sample php.in file:
v:\php5\php.ini.sample
If you will be using this latter file, make sure to copy it to f:\mptn\etc and modify its name appropriately:
copy v:\php5\php.ini.sample f:\mptn\etc\php.ini
Make certain to uncomment the extension directives specified above for our project to succeed.
Move/Copy the PHP DLL module under the V:\php5\apache2 directory into the V:\apache2\modules directory; the user might change directory to v:\apache2 and type:
move v:\php5\apache2\modphp5.dll modules\.
And now the user is ready to work in her Apache general configuration file. Assuming that the user's file system location is still v:\apache2, we observe that the OS/2 developer has placed an sample configuration file under the absolute directory path v:\apache2\conf. make sure to copy and rename it appropriately as follows:
copy conf\httpd.conf.sample conf\httpd.conf
Hence the user opens the httpd.conf file with her OS/2 EPM editor:
EPM conf\httpd.conf
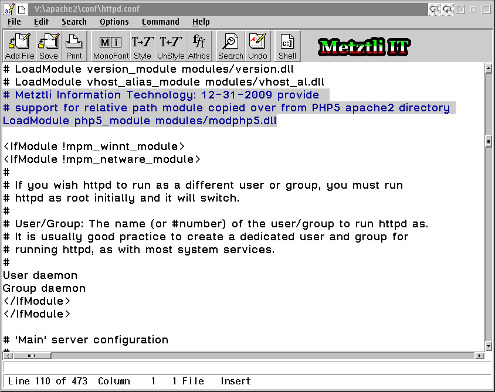
And adds the following directive after approximately line 110:
LoadModule php5_module modules/modphp5.dll
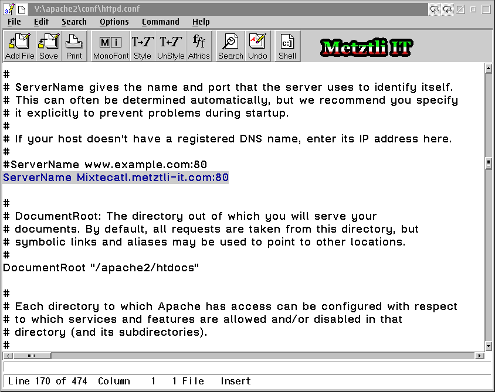
Save your partial modification(s). Next, still in httpd.conf, the user locates the directive ServerName and states the hostname of her OS/2 machine. Notice that the hostname for the OS/2 may be set on the fly for the current windowed session; alternatively (and for a permanent global setting), the user may modify his OS/2 CONFIG.SYS file (located at the root drive of his OS/2) by adding/modifying the hostname directive. Whatever manner the OS/2 hostname is set, make sure to enter it after the ServerName directive. For instance, for my OS/2 server hostname of Mixtecatl (Nahuatl for inhabitant of the cloud), I append a dot (.) followed by my domain name and standard web server port:
ServerName Mixtecatl.metztli-it.com:80
Notice that if you do not specify a hostname here, your Apache web server will default to localhost -usually 127.0.0.1- but you may specify your own IP address as well. Save your partial modifications.
Additionally, for informational purposes, note also the directive a few lines further down that points to the relative directory where we will subsequently expand our eyeOS Cloud Computing Operating System:
DocumentRoot "/apache2/htdocs"
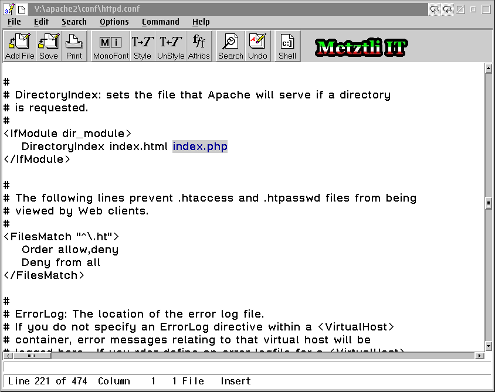
Continuing the httpd.conf modification procedure, we need to make sure that our Apache web server "knows" what to display if an potential visitor only specifies a directory in our host and/or domain. The default httpd.conf DirectoryIndex does not contain the index.php, hence we must add it ourselves since that is the default in PHP applications like b2evolution, eyeOS, etc., as below:
DirectoryIndex index.html index.php
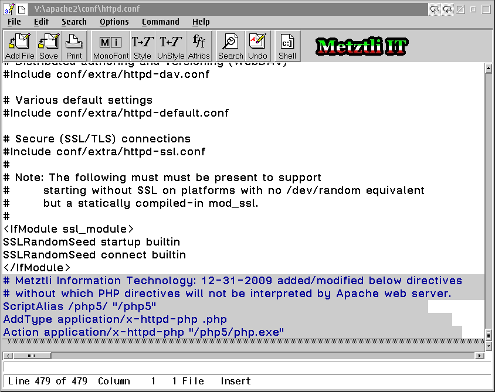
We save our changes and proceed to the last basic modification to our httpd.conf file. We add at the end of the file these following three(lines) without which the Apache web server will not be able to interpret PHP directives:
ScriptAlias /php5/ "/php5"
AddType application/x-httpd-php .php
Action application/x-httpd-php "/php5/php.exe"
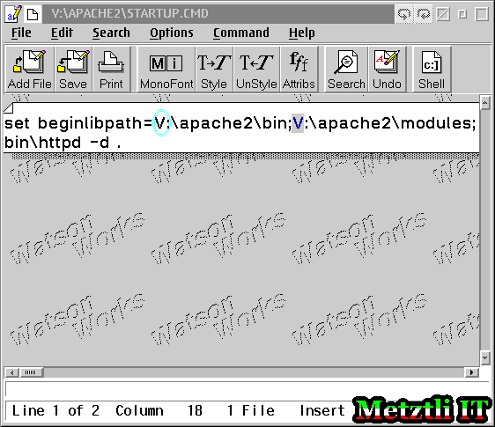
And save our changes to httpd.conf subsequently closing the file. Now, after making a copy of the original, open with your EPM editor the file (which absolute path is) v:\apache2\STARTUP.CMD using the command:
EPM STARTUP.CMD
Delete the first two lines and a segment of the last one, edit the U: drive letters to your proper Apache root drive installation -in my illustration it is the drive V:- and we end up with the simpler:
Code
set beginlibpath=V:\apache2\bin;V:\apache2\modules; | |
bin\httpd -d . |
Hence we are now ready to test our Apache web server including its interpretation (or lack of ![]() of PHP files. Regarding this last test, first we must create a small test file that we will place at the origin location from where Apache will serve its documents. Please type at your command prompt:
of PHP files. Regarding this last test, first we must create a small test file that we will place at the origin location from where Apache will serve its documents. Please type at your command prompt:
EPM v:\apache2\htdocs\info.php
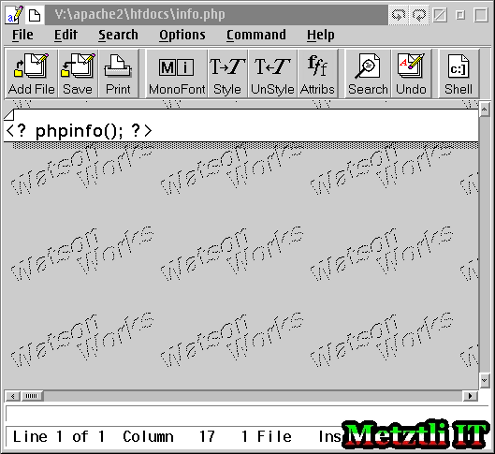
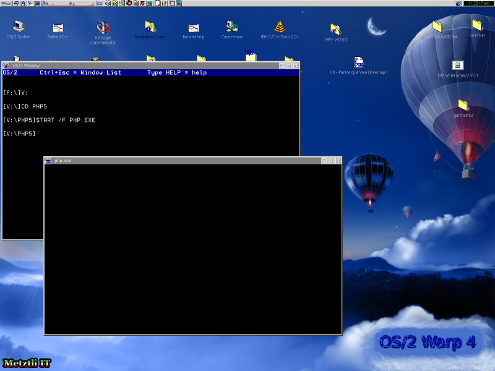
Save your file by pressing F2. Change directory to v:\php5 and execute start php.exe as follows:
CD V:\PHP5
START /F PHP.EXE
An apparently empty window with a blinking prompt will appear where the PHP daemon will be executing as seen in the picture below:
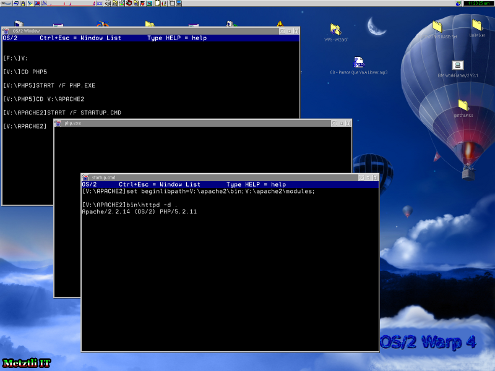
Now change directory to the Apache web server and start the respective daemon:
CD V:\APACHE2
START /F STARTUP.CMD
There should not be any errors;
with the possible exeption that the hostname was not set appropriately Apache defaulted to the localhost. If the latter is the case, you probably will still accomplish the task of installing eyeOS.
Very well, now is time to test the basic Apache web server functionality. I point my Firefox 3.0.4 browser to http://mixtecatl -if all is well, I get the following minimized screen with the large letters: It Works!
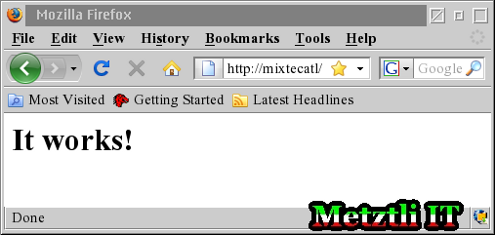
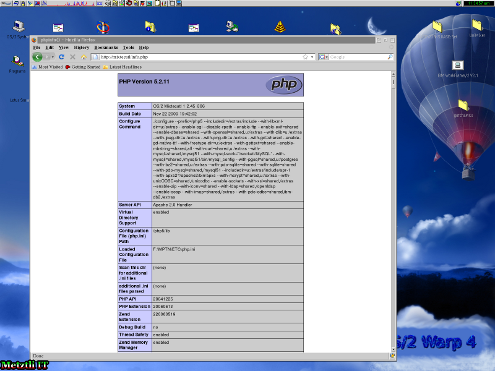
And then we point our browser at http://mixtecatl/info.php -again, if all is well, we should get the screen as below. Otherwise, please go back and review the last three(3) lines that we added to the v:\apache2\conf\httpd.conf file.
If you got to this point, paquilizcayolli! (Nahuatl for congratulations!) for our web server can serve HTML web pages as well as interpret PHP directives.
Installing eyeOS The Open Source Cloud's Web Desktop.
The question now now facing us is, where do we want to install eyeOS? By default eyeOS decompresses in a "folder" named (what else?) eyeOS under the current file system location -if no additional location directives are given. Accordingly, we might change directory to v:\apache2\htdocs and decompress the eyeOS bundle with appropriate directories as follows:
pkzip /extr /dir v:\workspace\eyeOS_1.9.0.0.zip
And we would have an newly created directory:
v:\apache2\htdocs\eyeOS
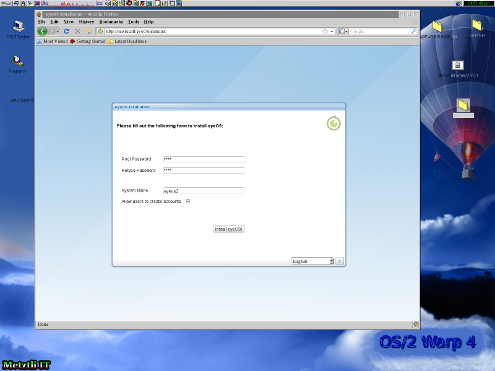
We subsequently point our browser to http://mixtecatl/eyeOS to begin the installation procedure of the Open Source Cloud's Web Desktop. Once our browser resolves the installation directory from the initial eyeOS origin, the installation screen gradually takes form and exposes several fields:
(Default) Root Password: root
System Name: eyeOS2
Check Box Option: Allow users to create accounts.
Press the Install eyeOS! button to start the installation routine; please, be patient and allow enough time for the procedure to complete.
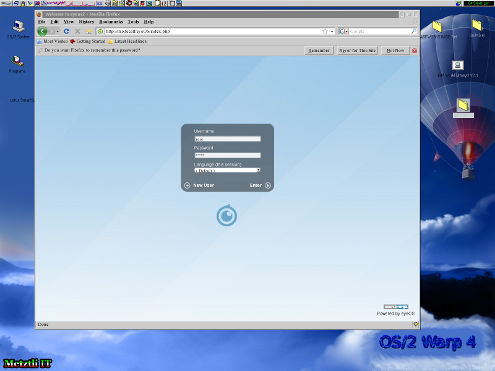
After a couple of minutes, my Firefox 3.0.4 load indicator stops and the eyeOS screen Ximopanolti (Nahuatl for Welcome) prompt appears, letting us know that the default root user should log in. Please do type in both fields the default user name and password that just happen to be the same for initial eyeOS setup.
WARNING: ![]() Please make sure to change your default password as soon as you log into your eyeOS Cloud Computing OS.
Please make sure to change your default password as soon as you log into your eyeOS Cloud Computing OS.
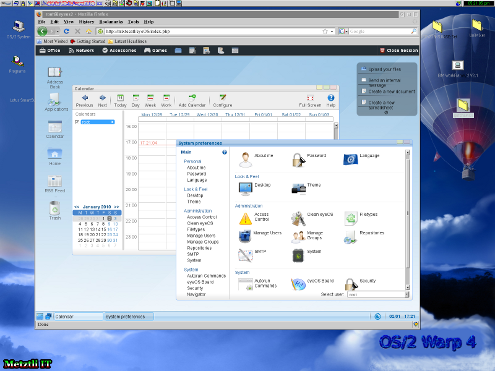
After we are accepted into eyeOS Cloud Computing OS, we can see that there are applications that provide an user of a hint on the potential of the eyeOS Open Source Cloud's Web Desktop. For instance, I click once in the Calendar eyeApp and subsequenly right-click the eyeOS Desktop itself and select the System Preferences.
To illustrate the installation of an typical application into the eyeOS, I have downloaded an additional theme from the Free eyeOS Applications repository. I have placed the compressed theme air.eyepackage on my eyeOS Desktop -on the lowest left column.
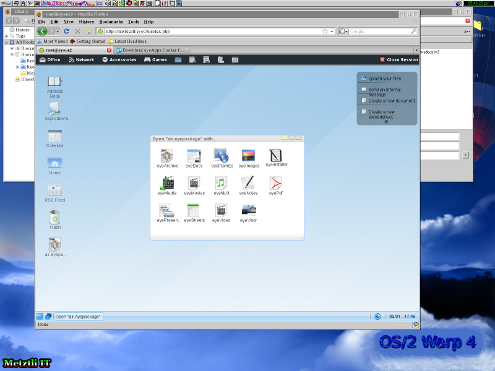
If I right-click on the eyeOS packaged theme, an ensuing set of applications will surface, and I will be prompted to select which one to use. Of course, this is for illustration purposes for eyeOS is being targeted at the enterprises where the applications are controlled so as to decrease internal vulnerabilities.
Of course, we select the eyeInstaller icon to accomplish the task ![]()
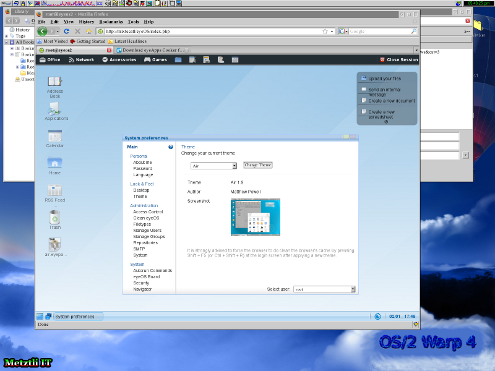
As in prior occasion, I right-click -not on the application- since it is already installed, but on the eyeOS Desktop itself and select System Preferences, and then the Theme icon:
I have to reboot for the new theme selected to become active. Upon the facing the Login screen, the user is advised to refresh his eyeOS instance by pressing Shift+F5 (or CTRL+Shift+R); in my OS/2 case, refreshing the eyeOS worked with the suggestion in parenthesis. Subsequently I enter my username/password credentials and the new theme gradually comes into existence. It is a beautiful blue that Nanahuatzin might draw a parallel to the blue cloudless sky:
Afterthought: notice that however wonderful and full of potential the eyeOS eyeApps may be, they are not immediately useful to humans who come to the USA and other developed countries following their survival instinct even if performing manual labor. In search of a better life and opportunities for themselves and their families, they come to the USA to improve the country with their work and culture; not to be forcefully separated from their children by the authorities. I support the passage of the USA Dream Act.
DISCLAIMER![]() Please do not hold me or Metztli Information Technology responsible if the information provided here does not achieve the desired result. The information is provided AS IS and with the hope that it may be useful to the Internet community --especially OS/2 and GNU/Linux users and/or administrators considering the potential benefits of cloud computing for their organizations' operations.
Please do not hold me or Metztli Information Technology responsible if the information provided here does not achieve the desired result. The information is provided AS IS and with the hope that it may be useful to the Internet community --especially OS/2 and GNU/Linux users and/or administrators considering the potential benefits of cloud computing for their organizations' operations.
Notwithstanding, There is no implicit or explicit guarantee that the information presented here is accurate --even though due diligence was exercised during the procedure. Accordingly, if an user(s) decide to implement the procedure or shell commands described here she, he, or them, do so at her, his, or their own risk. You have been forewarned.
The opinions expressed here are my own and do not represent by association those of IBM, nor even necessarily those of Metztli Information Technology as a whole.
Metztli Information Technology reserves the right to modify the content of the post or even to delete it altogether.

