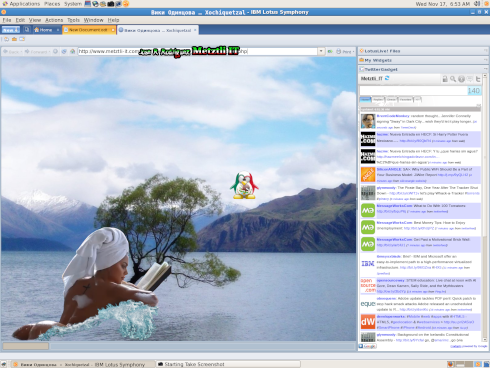
During the course of resolution of an issue in a remote web server in a GNU/Linux CentOS/Fedora distribution, I began reproducing the issue by installing an instance of the remote web applications in one of my local 32-bit CentOS 5 distributions. As a followed an appropriate methodology, I also installed the recent IBM Lotus Symphony 3 office productivity suite -including an iGoogle gadget to track my Twitter account. Below follows the procedure involved to install the open document format (ODF) office suite application -as well as leveraging one of the many features of Symphony.
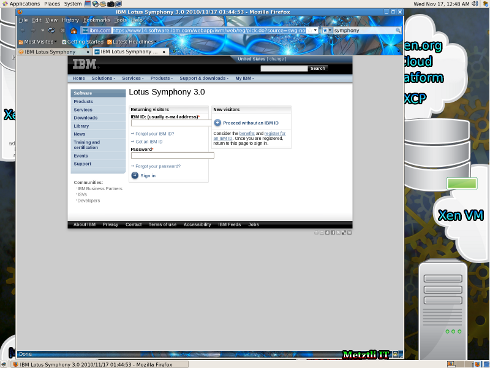
Hence, I headed to the IBM Lotus Symphony 3 download page. Registration is required for although Symphony supports natively the open document format (ODF) and is based on OpenOffice, it is nested into an IBM Eclipse like Java framework that provides a smoother interface. Accordingly, the user who desires to download Symphony has two choices: either create an IBM identification (ID) and use that to gain access to the office suite
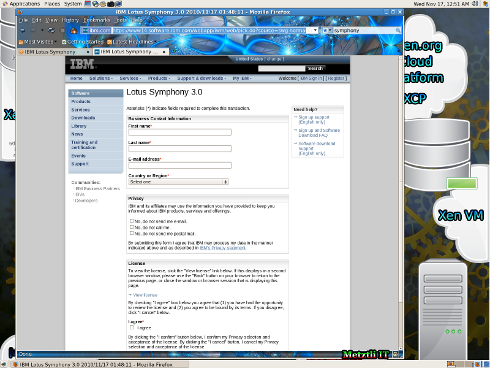
or user might simply enter her name, email address, and country, for a one time access to download Symphony package.
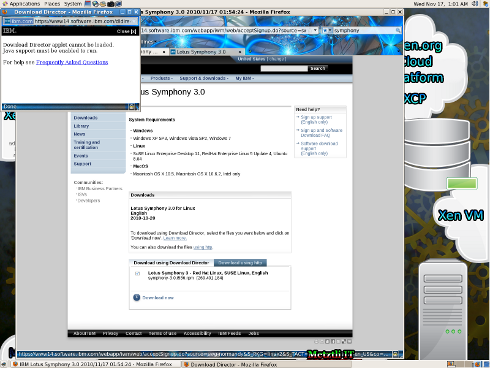
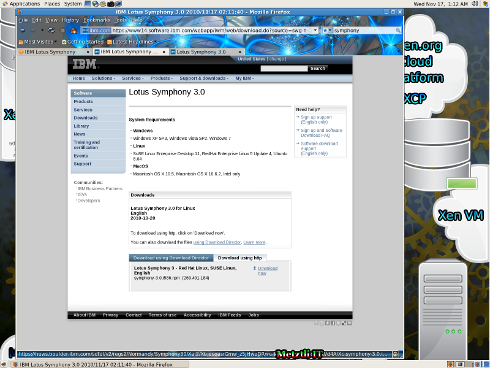
If the user agrees to either of the conditions stated above, then he will be taken to actual download page for Symphony. Notice that it was detected that I was using an Red Hat derived GNU/Linux operating system and provided the appropriate RPM file to download. Coincidentally, Novell SuSE also uses the RPM packaging -hence it is mentioned as well.
Additionally, observe the tabs at the bottom rectangle enclosing the download actions. By default, Symphony will be downloaded using the IBM Download Director (which will create a directory of the same name in your GNU/Linux user home, if allowed); nevertheless, for this to occur the user must have enabled the Java plugin in her browser. Otherwise she will get the dialog: Download Director can not be loaded. Java support must be enabled to run.
Well, we may always elect to download Symphony selecting the alternative tab labeled: Download using http.
Installing the IBM Lotus Symphony into GNU/Linux CentOS 5
Any manner that we download the symphony-3.0.i586.rpm for our GNU/Linux CentOS 5 distribution, we open a terminal shell and acquire super user privileges to install software in our system by becoming the root user and subsequently type:
rpm -ih symphony-3.0.i586.rpm
or
yum localinstall symphony-3.0.i586.rpm
where the -ih passed to rpm command directs it to install the Symphony RPM package and the h shows the progress of the installation.
After the IBM Lotus Symphony 3 installation completes, the regular user (not the super user or root) may start it from her desktop menu Applications, and subsequently select Office and select the Symphony icon. Or from the command line the regular user simply types: symphony. The installation routine creates a link from the
Code
/mnt/hda11/opt/ibm/lotus/Symphony/framework/shared/eclipse/plugins/com.ibm.symphony.standard.launcher.linux.x86_3.0.0.20101015-2340/IBM Lotus Symphony |
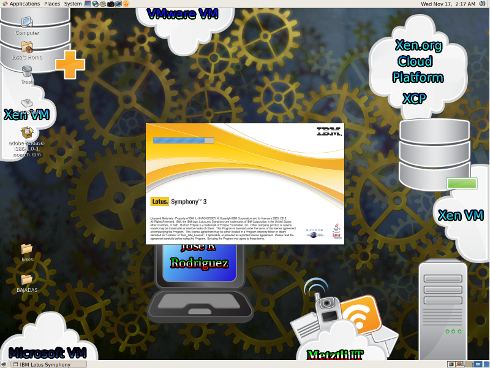
And the splash image of Symphony should in sort time appear similar to what is shown from my desktop snapshot:
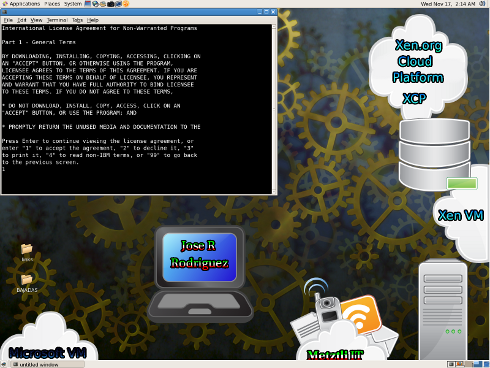
After a moment the splash image will vanish -please be patient- and a terminal window will appear in your GNOME desktop. The IBM Lotus Symphony 3 installation by the super user in your system was for a system wide use; accordingly each user of the system(s) is shown the license for his acceptance (enter 1), decline (enter 2), print (enter 3), read non-IBM terms (enter 4), or simple press the Enter key for additional information.
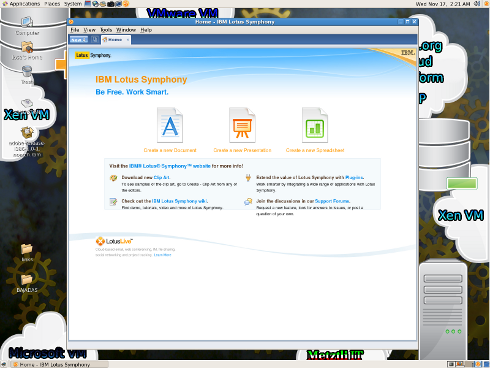
If the user accepts the IBM Lotus Symphony 3 licensing terms -by entering the number 1 and pressing the Enter key to proceed- the terminal shell will disappear once again and after a few seconds the Symphony splash image will reappear. Once the user instance is complete he will see a similar image as below: Symphony is ready!
Enabling the Side Bar of IBM Lotus Symphony 3 for Displaying Widgets
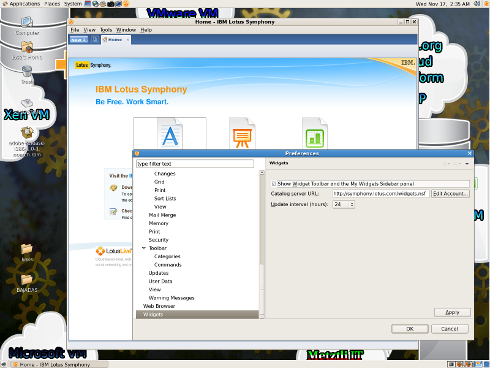
Proceed to select from the Symphony menu: File followed by Preferences:
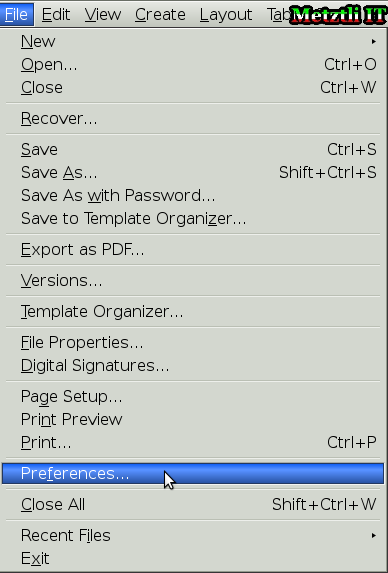
Hence the Preferences option dialog should surface and we move the slider to the bottommost option, which is Widgets. We check the little option box labeled: Show Widget Toolbar and the My Widgets Sidebar panel. Afterward we select the button labeled Apply and then the one labeled Ok.
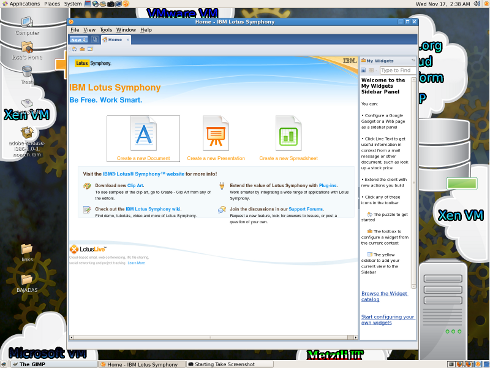
Well, we can see that the initial Symphony Home page has made space for the Welcome to the My Widgets Sidebar Panel.
Installing the Google iGadget Twitter Gadget to My Widgets Sidebar Panel
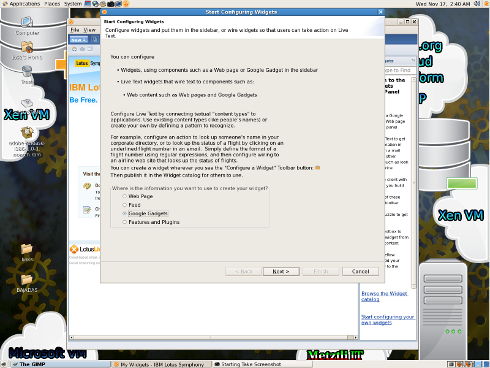
Please select the Start configuring your own widgets link at the bottommost of Symphony My Widgets Sidebar panel. A dialog will surface prompting you to Start Configuring Widgets. Read towards the bottom and select check the radio button next to Google Gadgets. Advance by "pressing" the Next button at the bottom.
Well, at this point it is necessary to have on hand the information that we will need for our iGoogle Gadget hence we direct our browser to TwitterGadget site. And we select the image labeled Gmail - Check Twitter and Email on the same page within Gmail. It will take us to How to Install TwitterGadget for Gmail
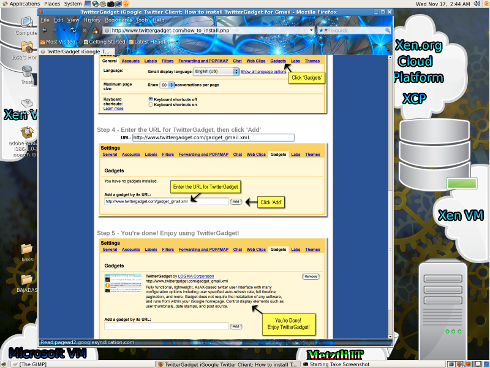
Scroll down until you can view the field below label Step 4 - Enter the URL for TwitterGadget, then click 'Add'. Accordingly, please copy whatever text is in the field as seen in example screen pic below:
The user may also decide to create an account at the TwitterGadget site to serve as intermediary if you do not want to (or can not) sign in with your Twitter account directly -once you finish the Google Gadget configuration.
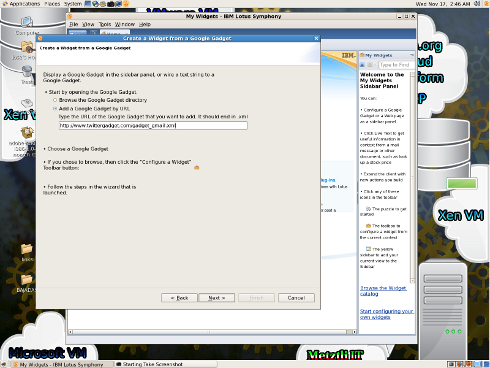
Thus, we go back to the Symphony Google Gadget configuration dialog where we left off and select (if not already by default) the radio button labeled: Type the URL of the Google Gadget that you want to add. It should end in .xml Evidently, in the entry field, please paste the line that we copied from the TwitterGadgetinstruction page.
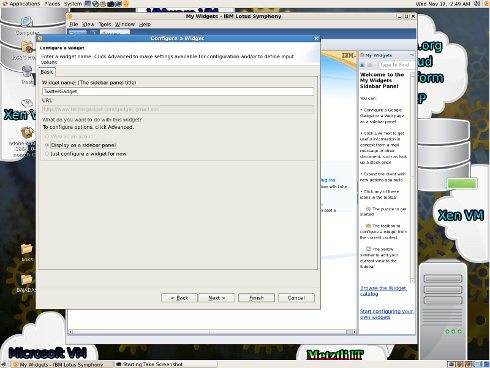
After pressing Next, we assign a Widget name (The sidebar panel title) to our Google Gadget (or leave default) and select (if not already) the radio button labeled: Display as a sidebar panel. Continue by pressing Next button.
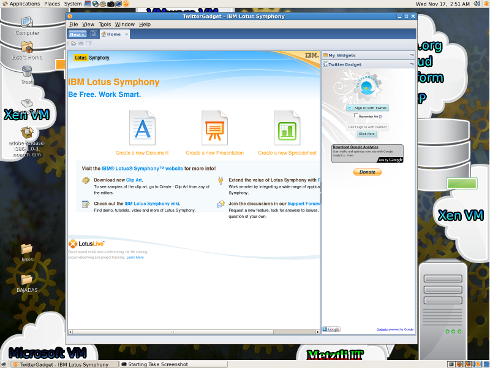
After we press the Finish button, Symphony will display our TwitterGadget in the sidebar panel -as it should ![]() ¡Paquilizcayolli! (Nahuatl for Congratulations!).
¡Paquilizcayolli! (Nahuatl for Congratulations!).
Please consider making a donation to the developer(s) of TwitterGadget
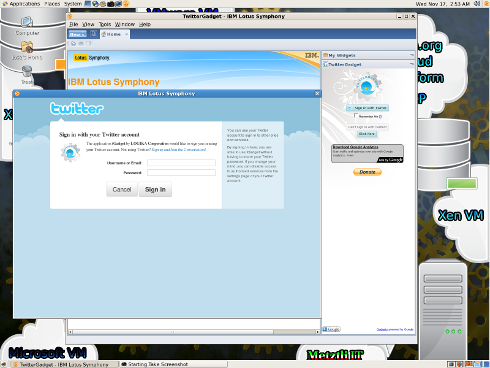
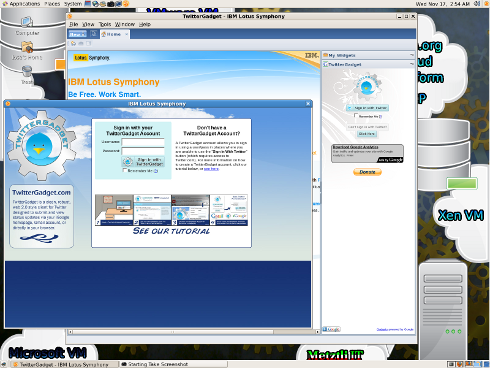
Well, we can observe that there are two blue buttons, with the wider one at the top labeled: Sign in with Twitter; pressing that will open a new window where the user may enter her Twitter Username or Email and Password:
If the user can not login with Twitter credentials -or does not want to- he may press the narrower button to sign in with TwitterGadget credential from an account previously created with at site. Remember that I mentioned the issue in prior note above; however you can still create an account with TwitterGadget site now.
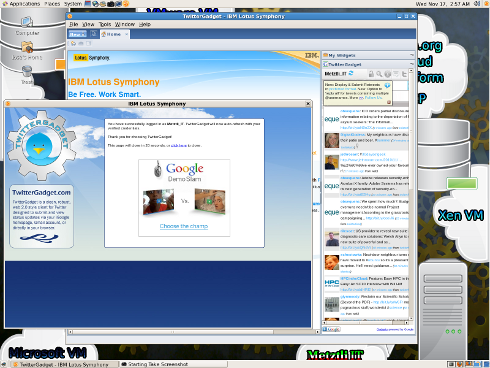
Assuming that the user enters appropriate login credentials for either site, then the time line (TL) of the users that you follow should begin streaming to your Google Gadget. Below is an example screenshot of the my TL streamed into my TwitterGadget.
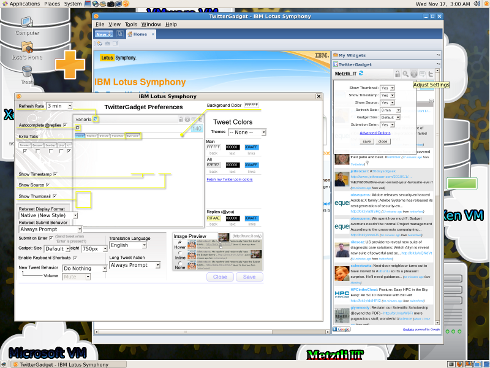
Oh, the user may configure the TwitterGadget to a certain degree by selecting the third icon from the left at the top of the Gadget. As the user hovers her pointer over it, a legend reads: Adjust settings. Selecting that button and subsequently following with the Advanced options link towards the bottom, an the TwitterGadget Preferences are displayed. The user is encouraged to tweak those to her personal convenience for an efficient Google Gadget use.
Well, what else to say ...enjoy the professional features of the IBM Lotus Symphony 3! What I covered here is but one feature related to social networking at home or in the office. Feel free to join the online community to receive support from your peers and assigned personnel. Symphony supports major world languages with an additional language pack. Nevertheless, if you or your organization -no matter how small or large- are interested in a pilot program, and or require formal support please get in touch us.
URL for Mexico-Tux in first image
URL for Firefox Personas: fractal frost
DISCLAIMER![]() Please do not hold me or Metztli Information Technology and its associates responsible if the information provided here does not achieve the desired result. The information is provided AS IS and with the hope that it may be useful to the Internet community --especially for CentOS 5 32-bit users of x386 GNU/Linux.
Please do not hold me or Metztli Information Technology and its associates responsible if the information provided here does not achieve the desired result. The information is provided AS IS and with the hope that it may be useful to the Internet community --especially for CentOS 5 32-bit users of x386 GNU/Linux.
Please be aware that there is no implicit or explicit guarantee that the information presented here is accurate --even though due diligence was exercised during the procedure(s). Accordingly, if an user(s), entity(ies), or concerned party(ies) decide to implement the procedures or shell commands described here she, he, or them, do so at her, his, or their own risk. You have been forewarned.
I reserve the right to modify the post or even delete it for any reason whatsoever.

