Xen and the Art of Reliable, Cost Effective, GNU/Linux Virtual Private Servers (VPS).
The proliferation of virtualization as an overall aspect of the Cloud Computing paradigm has made ubiquitous the availability of virtual private server (VPS) machines for individuals and small business entities. An VPS represents an cost effective solution to avoid the low extreme --represented by shared hosting, as well as the higher extreme --for instance that of an dedicated server(s). Using open source software virtualization technologies, like Xen and OpenVZ, new and established hosting organizations are offering customers managed and unmanaged VPS to host their online blogs, wikis, e-commerce, and mostly whatever resources an customer may wish to make available online. Of course, at Metztli Information Technology we are ready to help provision and/or manage your VPS for yourself or your business organization.
Note: for obvious security reasons in the information that follows, especially all snapshot illustrations, actual data pertaining to private entities has been altered from the original source.
There are, at least for the unmanaged VPS offerings, certain complementary technologies, like Lxlabs HyperVM, that will permit the customer to provision and configure her own flavor of GNU/Linux distribution VPS; well, in all fairness, HyperVM will enable provisioning and management of certain proprietary operating system VPS, as well. However, at Metztli Information Technology we recommend the superb stability and cost effectiveness of GNU/Linux distributions, in both physical and virtual environments, and that is what this (how-to) blog entry is about. Further, although Lxlabs HyperVM may support other virtualization technologies, we specifically select Xen for our VPS demonstration. This latter allows for the most configuration of virtual resources since its virtual machines (arguably) most closely resemble their physical counterparts.
Besides Lxlabs HyperVM, there are alternative home grown virtualization provisioning and configuration consoles or control dashboards. Their performance, functions, as well as security, will vary notwithstanding. Some of them, for instance will require access to the customer's virtual machine acting as a root user through the secure shell (SSH) for backup, configuration, and maintenance; evidently, this represents an security weakness since allowing SSH root access to your VPS will give free rein to an cracker that may get lucky and guess your root user password.
HyperVM does not require root privilege to manage or configure those virtual machines under its control because it accesses those VPS units from allocated management resources in the the physical machine(s) hosting the Xen virtual machines (VPS). Accordingly the root password for a virtual machine under the control of HyperVM is subordinate to the password used to access the HyperVM management interface or dashboard.
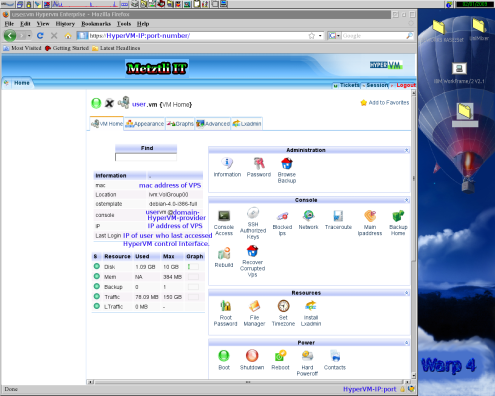
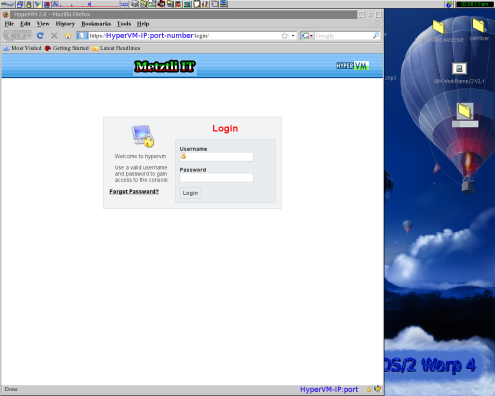
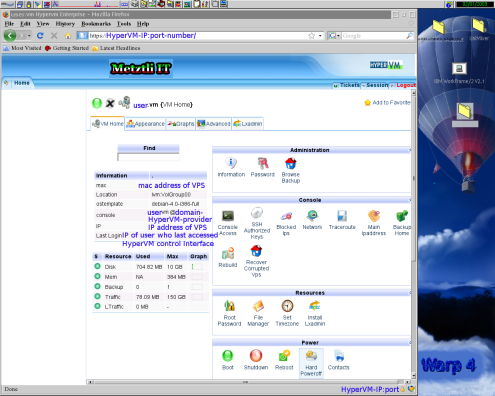
Evidently, the root password for an GNU/Linux VPS should be different from that most important password to access the HyperVM control interface. It follows that the password that you select for your HyperVM control interface, should be stronger than the password that you select for your root password in your VPS. Make sure to change the former upon your very first log-in entry into your HyperVM dashboard (an typical instance is shown below) to something other than what you indicated to your hosting provider --when you acquired your VPS.
Hence, after your initial login into the HyperVM control dashboard, you would select the icon Password found under Administration section:

Accordingly, after pressing the Password Icon above, the user would be taken to an page similar to the one in the screenshot below; at this location, the user is enabled to select an alternate possibly stronger password for accessing the HyperVM interface or dashboard.
At Metztli IT we believe Xen to be the most viable virtualization technology for the Cloud Computing paradigm; that is due in part to its low barrier of adoption open source nature and its multiple implementations by so varied free/open/hybrid commercial vendors. Additionally, proprietary virtualization vendors usually tie their virtualization management utilities to their proprietary operating systems or those of their proprietary vendor business partners. Accordingly, some (proprietary) virtualization management utilities will not even install, much less execute, on GNU/Linux distributions. At Metztli Information Technology, we avoid this sort of customer lock-in schemes.
By contrast, virtualization management solutions that implement Xen technology by relatively open standards oriented organizations such as Sun Microsystems, as an specific instance, are operating system agnostic (Java based); hence, these (solutions) provide choice for the customer and not a locked virtualization solution. In retrospect, I simply wish that XenServer had remained operating system agnostic with its Java-based virtualization management console, discontinued as of XenServer 4.x --at the dawn of Citrix acquisition of the open source virtualization vendor, XenSource. As of XenServer 4.x, Citrix makes available its Xen Hypervisor virtualization management console only on the Windows platform.
Engage your Prospective VPS Hosting Provider Before you Commence your Web Site Efforts.
Indeed, the use of open source Xen hypervisor technology, instead of that of an restricted proprietary equivalent like that of VmWare or MS HyperV, will enable anyone with an rudimentary technology understanding to become an VPS hosting entrepreneur. The unrestricted use of Xen technology coupled with its open source relatively low cost of entry will allow hosting providers to offer VPS with a choice of GNU/Linux distributions (and perhaps OpenSolaris); these Xen hypervisor managed GNU/Linux VPS will exhibit equal or better stability, at a fraction of the cost, of their restricted proprietary virtualization counterpart competitors.
An prospective VPS customer, notwithstanding, should be aware of the quality of the virtual machine offers available to them by the multiplicity of hosting providers. There are entrepreneurs out there that realizing how easy it is to acquire an dedicated server with an decent CPU and an equally decent amount of RAM, will set up shop online by installing web hosting/billing/support software and carving n-virtual machines in that physical server. There is nothing wrong with that, of course, except that they will also claim an 99.x percent uptime for your VPS –that is wrong!
In one (or two server set ups, if not properly done) these entrepreneurs will also host the domain of their start up business venture. Accordingly, if and when there are glitches in that specific server (or servers if not properly set up for failover) the customer will not even be able to reach their hosting provider to notify of issues in his VPS –that is bad!
Evidently, and this is merely a suggestion based on personal experience when we search for solutions for some of our customers, the prospective VPS client should carefully evaluate an extremely low cost VPS offering because, in the simplest case, there will likely not be enough resources for his hosting needs; likewise, an customer should approach with care an hosting provider that promises the most features, like disproportionate amounts of RAM and hard disk space, at an price that is suspiciously lower than equivalent offerings elsewhere.
Additionally, sometimes an VPS provider will advertise an money back guarantee for an certain period of time but will ignore the statement when it is time to fulfill the claim; moreover, there are times when the customer realizes the computing resources provisioned for her virtual machine(s)are less than what was agreed initially. In both of those instances, it simply shows an lack of professionalism on the part of certain VPS hosting providers. It manifests an lack of seriousness on the part of the entrepreneur(s) that in certain cases is due to the fact that the VPS hosting venture is merely an part time gig. Hence, make sure to ask questions of the VPS hosting provider because you are entrusting that entity with resources that will reflect your personal, professional, or commercial, digital image on the Web.
HyperVM: Rebuilding and Logging into an GNU/Linux VPS Instance.
With the above considerations behind, let us examine what it would be like to provision and provide rudimentary security for an low cost VPS where we will only install the relevant open source software components to support an b2evolution deployment under GNU/Linux Debian Etch. Please note that this overview applies to 32-bit as well as 64-bit GNU/Linux Debian distributions (this latter in an 64-bit virtual machine instance, evidently).
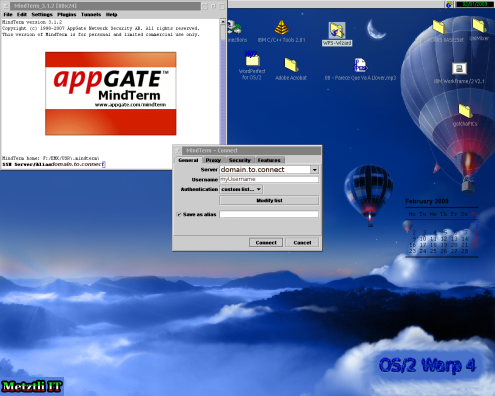
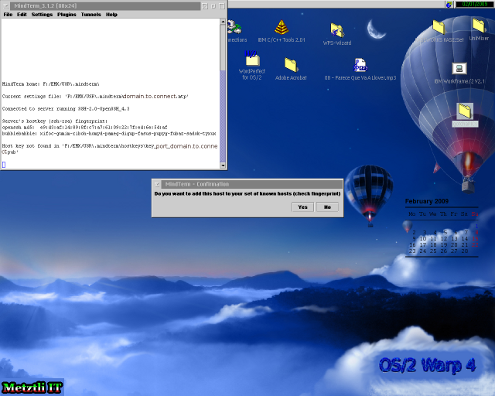
Further, we will set up the GNU/Linux VPS from the environment of an OS/2 Warp Merlin using the AppGate MindTerm Java secure remote access client. Evidently, I am using the last third party native OS/2 port of Java (1.4.1.x) by Golden Code Development (GCD) that provides support for my SMP aware OS/2; please be aware that no other Java implementations available for OS/2, with the exception of IBM's older 1.3.x release, provide SMP support for OS/2. Obviously, the choice of OS/2 for the procedure is merely personal since the procedure may be performed from any other operating system.[1]
It is often desirable for an customer who recently acquired her unmanaged VPS, without any especially ordered software installation --that is, only the bare GNU/Linux operating system-- to rebuild his virtual machine from the HyperVM interface dashboard. This is not necessarily the case if you log into your VPS within a relatively short time after you are informed by your hosting provider of the availability of your VPS.
The reason for rebuilding your VPS is due to the fact that even if you only order your VPS with the free Perl-based Webmin application, upon logging in for the first time and analyzing the /etc/log/auth.log file you will find that some cracker (or many) have already attempted (or even succeeded) to log into your newly acquired virtual resource! If your VPS has been provisioned for you for an interval of one day, for instance, you should not be surprised at the multiplicity of attempts (or successesful entries) by crackers from all over the world, literally.
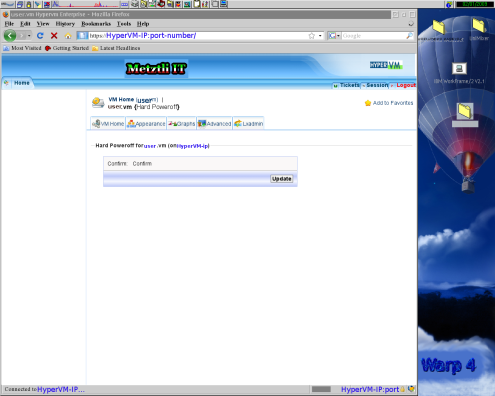
Accordingly, to remove all doubt about whether your VPS has been cracked into and the log entries subsequently erased, you might do well to rebuild your VPS. Hence, we completely stop our VPS server by using the (hilited) Hard Power off button under the Power section of HyperVM.
We will be prompted for confirmation of our desire to emulate under Xen the equivalent of powering off an physical server. Hence, we select the Update button:
The user may want to ping the IP address assigned to his VPS after a short while (when there is no more loading activity noticed in his browser) to verify that, in effect, his virtual machine is down. Although HyperVM has a button on its interface that is green when the VPS is alive, and turns red when in power off, that is no foolproof indication of the state of the virtual machine. For whatever reason, either due to the technical skills of the administrator who setup the HyperVM software on the hosting server or an inherent lag of HyperVM on updating its dashboard indicators, the button indicating the status of the VPS may not be accurate.
For instance the user may need to either log off HyperVM and then login again or refresh the HyperVM interface so that the color of the button indicator may be updated to reflect accurately the halted status of the VPS (as below). Hence the reason that pinging the IP address assigned to your VPS will, in certain instances, provide an quicker method to know the status of your virtual machine.

It is the case that HyperVM will shut down the VPS before it rebuilds the selected virtual machine; however, having realized that HyperVM does lag somewhat in updating the status of the dashboard visual controls, powering off the VPS "manually" is simply to be on the safe side. We do not want to risk leaving our Xen container in an unstable state.
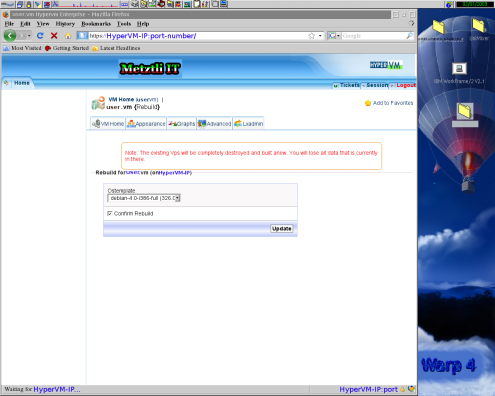
Accordingly, we proceed to rebuild our virtual machine by selecting the Rebuild icon under the Console section in the (main) Home tab of HyperVM.
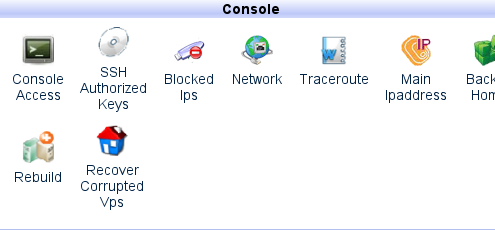
After selecting from the drop down menu the latest Debian available from our hosting provider, we check the small box next to Confirm Rebuild, subsequently followed by selecting the Update button.
Let the process finish for it takes a couple of minutes; when there is no more activity in the browser, from HyperVM Home tab, under the Power section, press the Reboot button to bring alive your newly rebuilt virtual machine.

After waiting another couple of minutes and when there is no more loading activity in your browser, proceed to ping the IP address assigned to your VPS machine. If the pinging is sucessfull, then you know that your newly rebuilt GNU/Linux image is ready to log yourself in. However, if the pinging is unsuccessful, proceed to press the Boot button and wait until your browser stops the loading activity (yes, approximately another couple of minutes). If your hosting provider is worth your business, then you should be able to ping the IP address of your machine after performing these actions ![]() .
.
Case Study: Networking Issue After User Rebuit her VPS.
There are low cost VPS offerings out there where the hosting organization will charge an customer for issues not related to the hardware hosting infrastructure or physical network. Notwithstanding, the quality of the GNU/Linux VPS template(s) available under HyperVM may exhibit intrinsic technical issues beyond the customer's ability to diagnose, much less implement an effective fix. Hence, some of these low cost hosting providers will charge an smaller periodic amount than equivalent VPS competitors offerings --their strategy (or business model) will force the customer to pay additional amount(s) for their services to enable an adequate functionality of the customers' VPS. Needless to say, unless the prospective customer is technically savvy and does not mind diagnosing and subsequently fixing essential issues in his virtual machine, these extremely low cost VPS hosting providers will cost more in the long run.
Nevertheless, for the sake of illustration, I will cover an certain case where, after rebooting an initially rebuilt VPS image, pinging the virtual machine IP address was futile.
In this interesting scenario the Xen virtual machine can not be accessed due to a networking misconfiguration, inside the VPS GNU/Linux image template; that obviously falls within the realm of responsibility of an decent hosting provider.
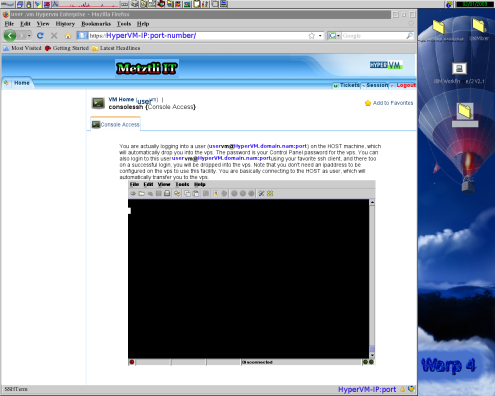
Although this certain VPS was unreachable from the Internet, the physical server hosting the Xen guest DomU virtual machines (VPS), as well as the HyperVM provisioning and management application, was apparently professionally kept. Accordingly, if I could not access this newly created virtual machine image (VPS) from the Internet side, I could always reach it by logging into HyperVM and using the integrated Java shell utility; this would drop me from the physical server hosting my virtual machine into my newly rebuilt and alive (by assumption) VPS.
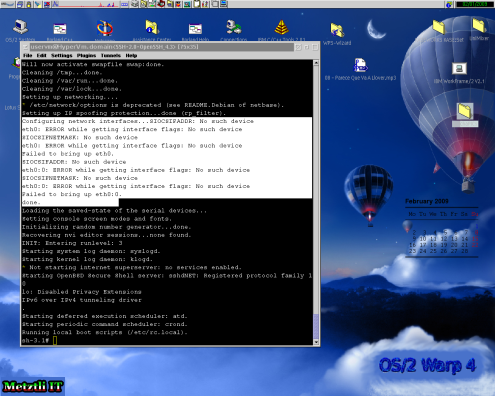
As can be seen in the screenshot below, although HyperVM's embedded Java client shell has partially executed, it did not successfully connect (or "drop me") into the the VPS instance. Once again, this should raise an alert as to the technical proficiency and/or seriousness of your prospective service provider --as an proper technical configuration of the Java client shell under HyperVM is also clearly the hosting provider's responsibility.
Nonetheless, as can be perceived from the hilited lines below (replicated from the snapshot above), it is enlightening to realize that we can use an alternate method to access our VPS even when networking has been misconfigured in the virtual machine:
You are actually logging into a user (uservm@HyperVM.domain.nam![]() ort ) on the HOST machine, which will automatically drop you into the vps. The password is your [HyperVM] Control Panel password for the vps. You can also login to this user uservm@HyperVM.domain.nam
ort ) on the HOST machine, which will automatically drop you into the vps. The password is your [HyperVM] Control Panel password for the vps. You can also login to this user uservm@HyperVM.domain.nam![]() ort using your favorite ssh client, and there too on a successful login, you will be dropped into the vps.
ort using your favorite ssh client, and there too on a successful login, you will be dropped into the vps. Note that you don't need an ipaddress to be configured on the vps to use this facility. You are basically connecting to the HOST as user, which will automatically transfer you to the vps.
By now I understood the reason we had been provisioned the older GNU/Linux Debian distribution Xen image instead of the latest, as we had requested; the initial Xen image provisioning was purportedly "free." This hosting provider was not even maintaining the technical viability of the Xen based virtual machine templates, evidently.
Well, I decided to log into the HyperVM hosting server side with my Java-based Mindterm secure client shell. What I found is that upon every rebooting instance of the VPS --from the HyperVM utility (the only way under these conditions)-- followed by logging into the above indicated machine hosting my VPS under consideration, I was able to get a glimpse of an hint on what caused the misconfiguration error in the virtual machine.
Replicating the message in the screenshot:
Configuring network interfaces...SIOCSIFADDR: No such device
eth0: ERROR while getting interface flags: No such device
SIOCSIFNETMASK: No such device
eth0: ERROR while getting interface flags: No such device
Failed to bring up eth0.
SIOCSIFADDR: No such device
eth0:0: ERROR while getting interface flags: No such device
SIOCSIFNETMASK: No such device
eth0:0: ERROR while getting interface flags: No such device
Failed to bring up eth0:0.
Well one thing is to get an glimpse of what is potentially wrong with the virtual machine (VPS); another quite different task is to figure out how to fix it --especially if I was not the one who created or maintained the Xen virtual machine resource template. Thanks to another open source peer who decided to treat at some length issues that (he) had experienced with GNU/Linux Debian Xen virtual machines. It turned out that (literally) removing the file referenced below represented an acceptable solution:
rm -v /etc/udev/rules.d/z25_persistent-net.rules
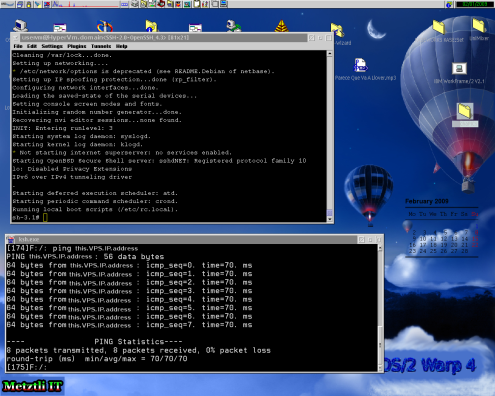
Accordingly, after once again rebooting the VPS from the HyperVM control dashboard, and subsequently logging into our VPS from the HyperVM hosting server side, we can see that the networking issue is no more. Additionally, we can see that we can ping the IP address of our VPS and it is alive:
Updating our GNU/Linux Debian distribution VPS.
Unless the VPS template from your provider is compromised itself, now you have an pristine VPS without any worries that it has been compromised by an cracker. Immediately log into your GNU/Linux VPS and change your root password to a mix of lower and uppercase characters, numbers, and non-alpha-numeric characters. Yes, you could have done that from your HyperVM interface prior to rebuilding your machine by selecting the icon labeled Root Password from the Resources section:
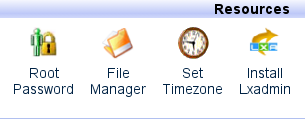
And the user would be taken to the HyperVM section where the user may re-create or edit her password:
Nevertheless, personal experience has shown me that an user should leave the default root password that had been initially indicated to the VPS hosting provider upon the initial VPS order --and subsequently change the root password once logged into the Xen virtual machine (VPS) resource.
Needless to say, if the user modifies her root or super user password from within her VPS GNU/Linux environment, the password shown under HyperVM relevant screen shown above will not reflect the actual modification performed by the root user from within her VPS. As a matter of fact, please be aware that your hosting provider HyperVM administrator(s) might make changes to your VPS that will not be reflected accurately in your particular HyperVM instance. The implementation of virtualization technology is at an relatively early stage and slowly but gradually will mature.
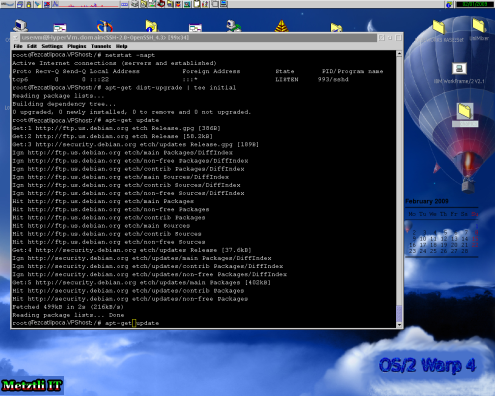
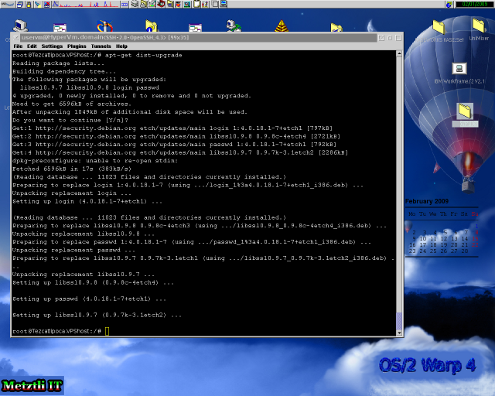
Additionally, you should refresh the repositories for your VPS and apply the latest distribution update. This will apply any recent security updates to your Xen GNU/Linux image. Below is an example of the procedure for our Debian vm:
apt-get update
apt-get dist-upgrade
Observing the snapshot above, we can see that it is necessary to refresh (update) the GNU/Linux repositories before any distribution upgrade attempt; otherwise, apt-get dist-upgrade will not find any available upgrades --as shown early in process in the console above pictured.
Please be aware that after an GNU/Linux Debian distribution upgrade where security updates were applied and/or after an migration from one hosting provider domain with an specific IP address to another hosting provider, hence an different IP address, you may see an similar warning as below (taken from an GNU/Linux shell):
$ ssh domain.to.connect
Connecting to domain.to.connect...
@@@@@@@@@@@@@@@@@@@@@@@@@@@@@@@@@@@@@@@@@@@@@@@@@@@@@@@@@@@
@ WARNING: POSSIBLE DNS SPOOFING DETECTED! @
@@@@@@@@@@@@@@@@@@@@@@@@@@@@@@@@@@@@@@@@@@@@@@@@@@@@@@@@@@@
The RSA host key for domain.to.connect has changed,
and the key for the corresponding IP address xy.ab.mn.vwe
is unchanged. This could either mean that
DNS SPOOFING is happening or the IP address for the host
and its host key have changed at the same time.
Offending key for IP in /home/username/.ssh/known_hosts:3
@@@@@@@@@@@@@@@@@@@@@@@@@@@@@@@@@@@@@@@@@@@@@@@@@@@@@@@@@@@
@ WARNING: REMOTE HOST IDENTIFICATION HAS CHANGED! @
@@@@@@@@@@@@@@@@@@@@@@@@@@@@@@@@@@@@@@@@@@@@@@@@@@@@@@@@@@@
IT IS POSSIBLE THAT SOMEONE IS DOING SOMETHING NASTY!
Someone could be eavesdropping on you right now (man-in-the-middle attack)!
It is also possible that the RSA host key has just been changed.
The fingerprint for the RSA key sent by the remote host is
xy:zw:ve:me:co:ly:ab:jk:lo:vr:nc:gf:qp:st:zo:wl.
Please contact your system administrator.
Add correct host key in /home/username/.ssh/known_hosts to get rid of this message.
Offending key in /home/username/.ssh/known_hosts:2
RSA host key for domain.to.connect has changed and you have requested strict checking.
Host key verification failed.
Couldn't read packet: Connection reset by peer
You may disregard the above warning if you know that, in effect, you just rebooted and/or reconnected after an distribution upgrade --hence application security patches were applied to your VPS. GNU/Linux Debian OpenSSL package was compromised as of version 0.9.8c-1 and since "...Affected keys include SSH keys, OpenVPN keys, DNSSEC keys, and key material for use in X.509 certificates and session keys used in SSL/TLS connections." affected VPS Debian distributions will regenerate SSH keys and you will see the warning above. Proceed to remove the local host SSH key at the line number specified under /home/username/.ssh/known_hosts and reconnect to your remote VPS.
Important note: Under no other circumstances should you fall into complacency and ignore the warning above since an cracker may have already done evil in your VPS.
Providing Basic Security Against Port 22 Intruder Attacks.
After the distribution upgrade, the user needs to apply some level of security to her GNU/Linux Debian VPS. Accordingly, before rebooting your virtual machine for the distribution upgrade to propagate fully, implement some security against those crackers that will surely come to attempt to break into your VPS by typing at your shell:
apt-get install fail2ban
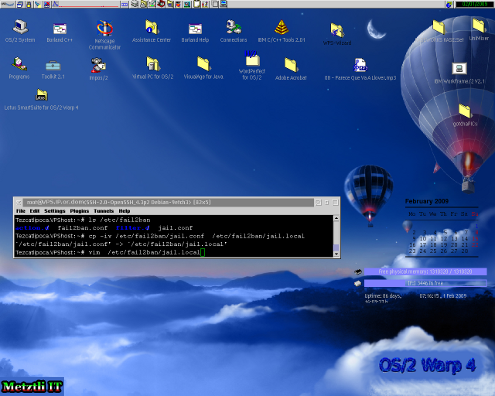
After the application is downloaded and installed into your Debian distribution, you will find an new directory /etc/fail2ban. Analyze its contents and proceed to make an copy of /etc/fail2ban/jail.conf as:
cp -iv /etc/fail2ban/jail.conf /etc/fail2ban/jail.local
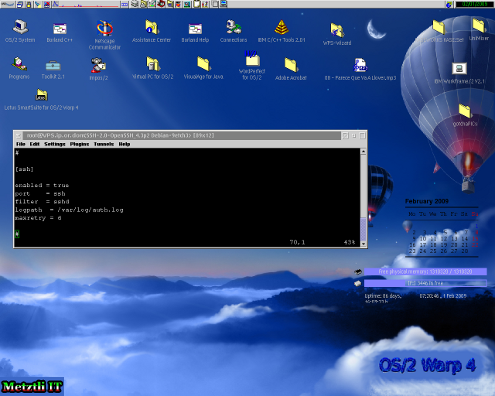
Under /etc/fail2ban/jail.local the user should make customization that will apply to her individual GNU/Linux environment. Opening the file in an text editor like vim one can see that it comes with an (few minutes interval) default banning action to users who make more than six(6) failed attempts to log into your VPS. Below is the relevant section of /etc/fail2ban/jail.local:
# The DEFAULT allows a global definition of the options. They can be override
# in each jail afterwards.[DEFAULT]
# "ignoreip" can be an IP address, a CIDR mask or a DNS host
ignoreip = 127.0.0.1
bantime = 600
maxretry = 3
Evidently, you should think about increasing the default bantime for cracker IP addresses as well as decrease the allowed number of attempts anyone may make. You should (initially) elaborate carefully about these actions since yourself, having just acquired your VPS, might implement mistakes during your initial logging attempts and accidentally leave yourself out of your VPS for some time.
Do not forget that every time you make a change to the file /etc/fail2ban/chain.local that you should restart fail2ban by changing directory as below:
cd /etc/init.d
And subsequently restarting fail2ban as follows:
./fail2ban restart
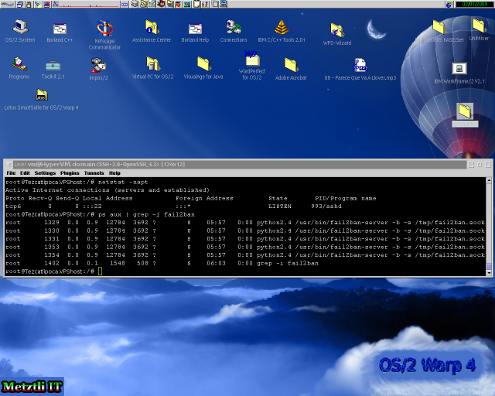
Below is an snapshot of the system processes for fail2ban:
The Importance of Proper Permissions for GNU/Linux /tmp
We can see that fail2ban, as well as other applications, makes use of the /tmp directory to save its fail2ban.sock reference. The point I want to emphasize is the importance of having the temporary directory location /tmp with permissions for other than the root or super user privilege to write to it. As fail2ban has been recently installed into GNU/Linux, it is the root user who initiated the application, as I showed above. However, upon a reboot of your VPS, if the /tmp directory has not liberal global permissions, the /tmp/fail2ban.sock will not be removed by the operating system routine with the end result that fail2ban will not restart! This case obviously will allow free rein to crackers to attempt logging into your VPS, by brute force, as many times as they please.
By the way, the MySQL DB application (and others probably) also need to write to the /tmp directory and, again, if the permissions there are too restricted, for instance not allowing write access to others than the super user root and those users and/or applications belonging to the root group, your b2evolution (among other applications being supported by MySQL) will not function properly because MySQL will output
(sample b2evolution specific MySQL error)
An unexpected error has occured!
If this error persits, please report it to the administrator.
Go back to home page
Additional information about this error:
MySQL error!
Can't create/write to file '/tmp/#sql_933_0.MYI' (Errcode: 13)(Errno=1)
Your query: Results::Query()
SELECT evo_blogs.*, user_login
FROM evo_blogs INNER JOIN evo_users ON blog_owner_user_ID = user_ID
ORDER BY blog_ID ASC
LIMIT 0, 20
instead of publishing its relevant blog data. Below is the relevant fragment from an default MySQL /etc/mysql/my.cnf configuration file, showing defaults directive indicating MySQL temporary directory:
[mysqld]
#
# * Basic Settings
#
user = mysql
[...]
tmpdir = /tmp
[...]
Accordingly, make sure that your /tmp directory allows reading and most importantly, writing (implies erasing), to other applications in your VPS. We have found some instances where the permissions were inadequate. As an specific instance, typing as below in my shell will reveal (hilited in green and blue) the relevant appropriate permissions:
ls -ld /tmp
drwxrwxrwt 13 root root 600 2009-02-24 05:04 /tmp/
Please note also the blue hilited letter t at the end of the string showing the directory permissions above. As it is relevant to directory permissions, we can copy verbatim an fragment from the man chmod information:
RESTRICTED DELETION FLAG OR STICKY BIT
"The restricted deletion flag or sticky bit is a single bit, whose interpretation depends on the file type. For directories, it prevents unprivileged users from removing or renaming a file in the directory unless they own the file or the directory; this is called the restricted deletion flag for the directory, and is commonly found on world writable directories like /tmp."
For additional information on fail2ban, please reference "Preventing Brute Force Attacks With Fail2ban On Debian Etch" and/or if interested in contributing to the community that maintains fail2ban, please visit their website.
Do not Allow SSH Remote root Login to Your VPS.
Another security measure you should take is disallow remote SSH root access to your VPS. For this to work, you will have to create an account for an regular user. For an concrete illustration, let us say that we will add the user tlaloc to our system, we would type at our shell:
adduser tlaloc
(sample shell output)
Adding user `tlaloc' ...
Adding new group `tlaloc' (1006) ...
Adding new user `tlaloc' (1004) with group `tlaloc' ...
Creating home directory `/home/tlaloc' ...
Copying files from `/etc/skel' ...
Enter new UNIX password:
Retype new UNIX password:
passwd: password updated successfully
Changing the user information for tlaloc
Enter the new value, or press ENTER for the default
Full Name []:
Room Number []:
Work Phone []:
Home Phone []:
Other []:
Is the information correct? [Y/n]
(see man adduser for further information on the command)
Needless to say, make sure to select an strong password (mix upper and lower case alphabet letters, numbers, and non-alpha-numeric characters); you will be prompted to enter the password twice for verification purposses. Although tlaloc will have lesser system privileges than root (i.e., super user), user tlaloc will be the only one allowed to remotely log into your VPS.
Once the lesser privilege user account has been created we need to modify the file /etc/ssh/sshd_config to add user tlaloc (and/or other users if you created more than one) as the only one who can access your VPS remotely. In this file we should first explicitly disallow remote root SSH access, but first make an backup copy of the file:
cp -iv /etc/ssh/sshd_config /etc/ssh/sshd_configBAK
Proceed to edit the file with your text editor of choice, I used vim:
vim /etc/ssh/sshd_config
Please locate the section labeled # Authentication. It will be at approximately line 23, as seen in the example fragement below:
# Authentication:
LoginGraceTime 600
PermitRootLogin yes
StrictModes yes
Make sure to change the line directive PermitRootLogin yes to PermitRootLogin no. Accordingly, after the change, the fragment should now look like:
# Authentication:
LoginGraceTime 600
PermitRootLogin no
StrictModes yes
Now proceed to the end of the file (approximately line number 75) and add the following comment (starts with # character) and directive below the (likely) existing line UsePAM yes, as shown below:
UsePAM yes
# Let's restrict remote login to user tlaloc
AllowUsers tlaloc
Needless to say, replace the user name tlaloc with your user name that you added priorly. Save your changes to /etc/ssh/sshd_config and exit your text editor.
Proceed to change directories by typing:
cd /etc/init.d/
and enter the command to restart your SSH server as:
./ssh restart
Now, stay logged in as root and open another shell (or MindTerm Java secure remote access shell client) and try to connect to your VPS IP address or domain name (if the latter, do not include the http://www. string that you would usually type at your browser). Use the non-root account that you recently created for the main purpose of login into your VPS as an lesser privileged user and type the non-root password for that lesser provilege user. If you are able to log into your VPS as non-root then your task is done. You have just made it more difficult for an cracker to log into your system as root (or super user) and have free rein to do as he pleases. In the nightmare scenario where an cracker might be able to guess your non-root regular user password, such an malevolent individual(s) will be limited to actions of lesser privilege.
If you will be managing your own VPS online, please do implement an proactive security approach because you can be certain of one thing: you will be attacked. Crackers who successfully do crack into your VPS will infest your resources with malicious software/code modifications, such as rootkits, malware, etc., that will be used to further their (crackers') interests. These individuals do not care if your reputation is destroyed as a direct result of their actions; accordingly make sure to at least implement basic port 22 security, monitor closely your /var/log/auth.log, and perform regular backups of your data. Although you are able to recover the pristine state of your VPS from the HyperVM console interface or dashboard, your unique configurations and data for your online resources should be backed up and downloaded locally at regular intervals.
I will likely follow this entry with the subsequent phase consisting of the actual b2evolution required supporting software applications, such as Apache2, MySQL, as well as an MySQL backup application that you can use to backup your blogs and recover in case of software or hardware infrastructure failure, migrations to another host provider, etc..
[1]Well, in retrospect, my choice of OS/2 is to show remaining OS/2ers that they do not have to migrate to proprietary technlogies to continue their business, as well as personal, computing tasks. The only requirement is to attain an positive, inclusive, open mind towards what the free/open source readily offers everyone: genuine freedom of choice. After all, the Penguin has been most helpful to the OS/2 continued viability than the proprietary technology in OS/2 users usual alternate choice of closed source computing enviroment. Accordingly, for my fellow OS/2ers, it is time to synchronize your actions with your words --no offense intended.
Additionally, we can see that any future efforts at OS/2 kernel development (if at all) should be directed at providing the most compatibility with the Linux kernel. This latter being a prerequisite to viability of OS/2 itself in an virtual environment like that sustained by open source hypervisors like Xen.NOTE![]() The educated opinions expressed do not necessarily reflect those of Metztli Information Technology as a whole.
The educated opinions expressed do not necessarily reflect those of Metztli Information Technology as a whole.
Suggestion code for commands entered at the OS/2 and MindTerm secure remote shell client(s) prompt are provided on an as-is basis. Although due diligence has been applied, the information may not be accurate under all circumstances.
Consequently, please do not hold Metztli IT responsible if unforeseen effects are experienced. You are not obliged to use the information provided.
Metztli IT reserves the right to modify the procedure --including deleting the blog entry.

